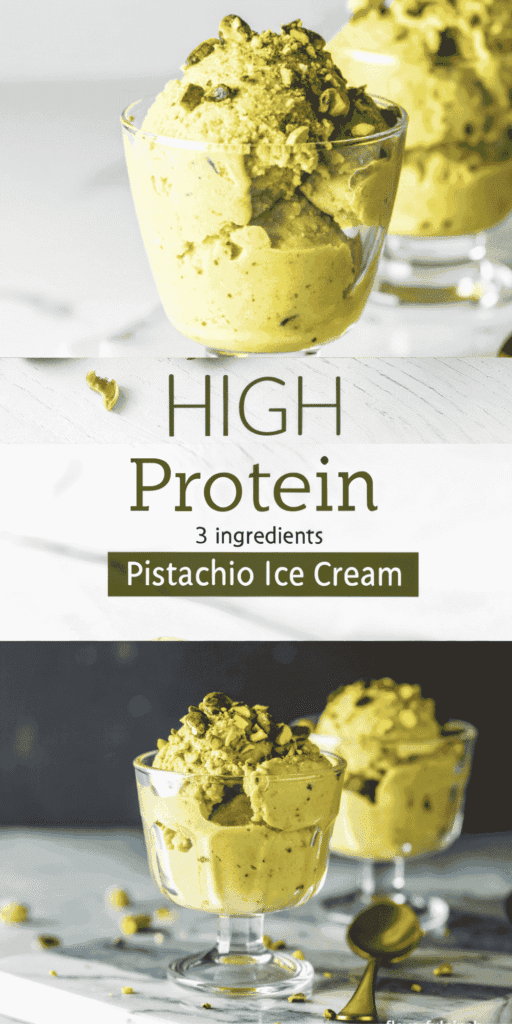
Ice cream that’s healthy and easy? Yes, please!
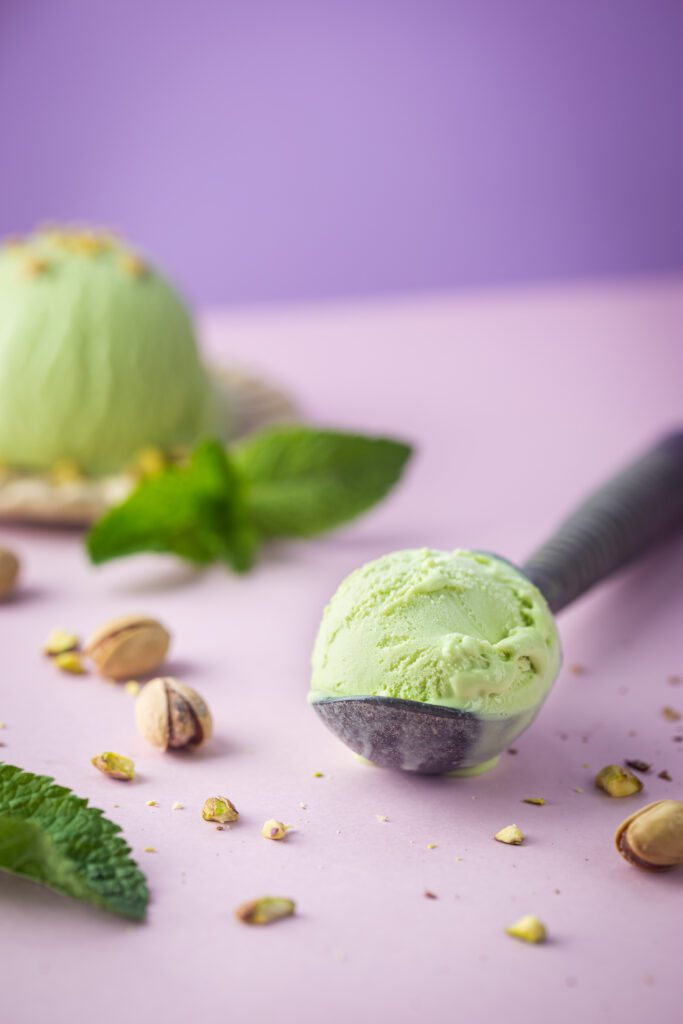
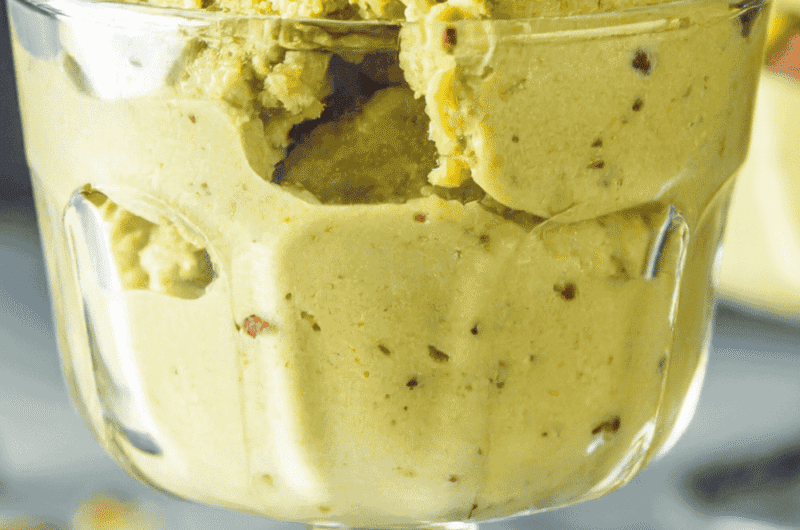
This high protein pistachio ice cream is creamy, nutty, and made with just three simple ingredients, blended cottage cheese, maple syrup, and pistachios. It’s a 3-ingredient ice cream recipe that feels indulgent but is actually protein-rich and light. Every bite gives the perfect balance of sweetness and nutty flavor, making it a treat you can enjoy anytime.
This high protein dessert is packed with nutrients. The cottage cheese provides protein to keep you full, pistachios give healthy fats and a satisfying crunch, and maple syrup adds natural sweetness without refined sugar. That makes this a low sugar high protein ice cream you can enjoy guilt-free.

It’s the perfect homemade protein ice cream for a fitness-friendly dessert, an afternoon snack, or a quick way to satisfy your sweet tooth.
With only three ingredients, it’s simple to make, easy to tweak, and fun to enjoy. You can add extra nuts, a sprinkle of cocoa, or some fresh fruit to make it even more special.
Ingredients You'll Need
2 cups cottage cheese
1/4 cup maple syrup
1/2 cup shelled pistachios
Optional for garnish: a few extra chopped pistachios for topping
Tools You’ll Need
- High-speed blender or food processor
- Freezer-safe container
- Spatula
- Measuring cups and spoons
- Spoon or ice cream scoop
- Silicone molds or small cups (optional)
Step-by-Step Directions
- Start by adding cottage cheese, maple syrup, and pistachios to a high-speed blender. Blend for 1–2 minutes until the mixture is completely smooth.
Check that the pistachios are finely ground, and the cottage cheese has a creamy texture with no lumps. If the mixture looks a bit thick, you can stop and scrape down the sides of the blender to ensure everything is fully blended. - Pour the blended ice cream mixture into a freezer-safe container. Use a spatula to even out the top so the ice cream freezes uniformly. This also makes it easier to scoop later. Make sure the container is wide rather than deep for quicker and more even freezing.
- Cover the container tightly with a lid or plastic wrap. Place it in the freezer and let it freeze for 4–6 hours until firm. For best results, freeze overnight. This slow freeze helps the ice cream set properly without forming too many ice crystals, keeping it creamy.
- When ready to serve, remove the ice cream from the freezer. Let it sit at room temperature for 15–20 minutes to soften slightly. This makes scooping easier and ensures the ice cream has a creamy, smooth texture rather than being rock hard.
- Scoop the ice cream into bowls or cones. For extra flavor and texture, top with chopped pistachios or nuts of your choice. Each scoop should be creamy, nutty, and naturally sweet, with a smooth base and crunchy bits from the nuts.
Nutrition Table (Estimated per Serving)
| Nutrient | Approximate Amount |
|---|---|
| Calories | 180–200 kcal |
| Protein | 12–15 g |
| Fat | 10–12 g |
| Carbohydrates | 12–15 g |
| Sugar | 8–10 g |
| Fiber | 2 g |
This makes it a protein-rich frozen treat that is both satisfying and nutritious.
Protein-Packed Benefits
This high protein pistachio ice cream isn’t just a delicious treat, it’s also a great way to boost your protein intake. Packed with cottage cheese and pistachios, it provides a healthy balance of protein, fats, and carbs, making it more than just a dessert.
- Supports muscle growth: The protein from cottage cheese helps repair and build muscles after workouts.
- Keeps you full: High protein content helps you stay satisfied longer, reducing unhealthy snacking.
- Nutritious fats: Pistachios provide healthy fats that support heart health and brain function.
- Low sugar: Using maple syrup instead of refined sugar keeps the dessert guilt-free.
- Fitness-friendly snack: Perfect for post-workout recovery or a mid-day protein boost.
Serving Ideas That Wow
This high protein pistachio ice cream is delicious on its own, but a few simple serving ideas can turn it into a show-stopping dessert. With some creative toppings and presentation, you can make each scoop look as good as it tastes.
- Serve in small bowls or dessert glasses and sprinkle extra chopped pistachios on top for added crunch.
- Drizzle a little maple syrup, chocolate sauce, or caramel for a touch of indulgence.
- Add fresh fruit like raspberries, strawberries, or banana slices for color and natural sweetness.
- Layer with crumbled cookies, granola, or cacao nibs for texture and contrast.
- Use waffle cones or edible bowls for a fun and portable dessert option.
- Garnish with mint leaves or a dusting of cocoa powder for a professional-looking finish.
- Serve alongside protein bars or a smoothie for a complete protein-packed snack or dessert combo.
Tips and Tricks for Perfect Texture
- Use full-fat cottage cheese for a creamier, smoother ice cream; low-fat versions work but may be less rich.
- Blend the cottage cheese, maple syrup, and pistachios thoroughly to eliminate lumps and achieve a silky texture.
- Grind pistachios finely before adding; large chunks can make scooping uneven.
- Freeze in a shallow, freezer-safe container for even freezing and easier scooping.
- Let the ice cream freeze for at least 4–6 hours, or overnight, for best firmness.
- Take the ice cream out 15–20 minutes before serving so it softens slightly and scoops easily.
- Avoid overmixing once frozen, as this can make it icy instead of creamy.
- Fold in any extra nuts or chocolate chips after the ice cream has partially frozen to prevent them from sinking.
- Taste and adjust the sweetness before freezing, as ice cream tastes slightly less sweet when frozen.
Mix It Up – Ingredient Swap Ideas
- Nuts: If you don’t have pistachios or want a different nutty taste, try almonds, cashews, or walnuts. Each nut gives a unique flavor and texture, almonds add a mild crunch, cashews make it creamier, and walnuts give a slightly earthy note.
- Nuts: If you don’t have pistachios or want a different nutty taste, try almonds, cashews, or walnuts. Each nut gives a unique flavor and texture, almonds add a mild crunch, cashews make it creamier, and walnuts give a slightly earthy note.
- Cream Base: Cottage cheese can be replaced with Greek yogurt for a slightly tangier and creamier texture. This still keeps the ice cream high in protein, while giving a different mouthfeel that some people prefer.
- Sweeteners: While maple syrup is smooth and natural, you can swap it with honey, agave, or coconut nectar. Each sweetener has a slightly different taste and sweetness level, so adjust the amount to your preference.
- Crunchy Extras: Add extra texture by mixing in chopped nuts, cacao nibs, or seeds. These give every scoop a satisfying crunch and make the ice cream feel more luxurious and fun to eat.
Flavor Experiments – Make It Your Own
This high protein pistachio ice cream is a versatile base that you can easily customize to suit your taste. Whether you want to try new flavors, add textures, or make it more indulgent, there are plenty of ways to experiment and make this ice cream truly your own.
These simple tweaks let you enjoy a fresh spin on the classic nutty treat every time.
- Add a dash of cocoa powder or melted chocolate for a chocolate pistachio version.
- Mix in vanilla, almond, or cinnamon extract for a subtle flavor boost.
- Fold in fresh or frozen berries like raspberries, blueberries, or chopped strawberries for a fruity twist.
- Sprinkle chopped dark chocolate, cacao nibs, or coconut flakes for extra texture and flavor.
- Experiment with different nuts like cashews, almonds, or pecans to change the crunch and taste.
- Add a swirl of peanut butter or almond butter for a nutty double-flavor experience.
- Try a hint of espresso or coffee powder for a coffee-pistachio variation.
Make-Ahead Tips for Busy Days
Preparing this high protein pistachio ice cream ahead of time makes it perfect for busy days or quick desserts. You can get most of the work done in advance, freeze it, and have a delicious, protein-rich treat ready whenever you need it. With a few simple steps, you can save time and enjoy fresh, creamy ice cream without any stress.
- Prepare the ice cream base ahead and store it in a covered container in the fridge for up to 24 hours before freezing.
- Freeze in individual portions using small cups or silicone molds for grab-and-go servings.
- Make a larger batch in a shallow container and scoop as needed for quick desserts.
- Label the container with the date to keep track; best eaten within 1–2 weeks.
- Partially freeze for 1–2 hours, then swirl in extra nuts or chocolate chips before letting it fully freeze.
- Keep chopped pistachios or other toppings ready in the fridge to sprinkle on top when serving.
- For a quick scoop, take the ice cream out 10–15 minutes before serving to soften.
The Vegan-Free Version
If you prefer a dairy-free and vegan-friendly ice cream, this recipe is easy to adapt. Simply replace the cottage cheese with silken tofu or a thick plant-based yogurt, keeping the creamy texture while staying protein-rich.
Use maple syrup for natural sweetness and pistachios for nutty crunch. This version is just as smooth, delicious, and satisfying as the original, making it a perfect healthy dessert or frozen treat for anyone avoiding dairy. It’s quick to make, low in sugar, and completely plant-based, so everyone can enjoy it guilt-free.
Why This Vegan Version Works
- Plant protein: Silken tofu provides protein to keep you full.
- Healthy fats: Pistachios offer natural fats and crunch.
- Low sugar and guilt-free: Maple syrup gives just the right sweetness.
- Simple and quick: Only three ingredients, no churn, and minimal prep.
The Final Words
This high protein pistachio ice cream is creamy, nutty, and easy to make with just three ingredients. It’s a protein-rich, low sugar treat that can be enjoyed as a dessert, snack, or post-workout pick-me-up.
With simple tweaks, fun variations, and creative serving ideas, it’s a versatile recipe that the whole family can enjoy. Quick to make, healthy, and delicious, it proves that homemade ice cream can be both satisfying and guilt-free.
Frequently Asked Questions
1. Can I use nuts other than pistachios?
Yes, you can use almonds, cashews, or walnuts instead of pistachios. Each type of nut will give the ice cream a slightly different flavor and texture, but it will still be delicious.
2. Can I make this recipe dairy-free or vegan?
Yes, this recipe can be made dairy-free or vegan by replacing the cottage cheese with silken tofu or a thick plant-based yogurt. This version will still be creamy and protein-rich.
3. How long does it take to freeze?
The ice cream should be frozen for at least 4–6 hours. Freezing it overnight will give it a firmer texture and make it easier to scoop.
4. Can I add chocolate, fruit, or other mix-ins?
Yes, you can fold in small pieces of chocolate, fruit, or extra nuts before freezing. This will add flavor, texture, and make each scoop more interesting.
5. How long can I store it in the freezer?
You can store the ice cream in a tightly sealed freezer-safe container for up to 1–2 weeks. For the best taste and texture, it is recommended to consume it sooner rather than later.
High Protein 3-Ingredient Pistachio Ice Cream
Course: Dessert6
servings10
minutes4
hours4
hours10
minutesIngredients
2 cups cottage cheese
1/4 cup maple syrup
1/2 cup shelled pistachios
Optional: extra chopped pistachios for topping
Directions
- Place the cottage cheese, maple syrup, and pistachios into a high-speed blender. Blend the ingredients for 1–2 minutes or until the mixture becomes completely smooth and creamy, with no lumps remaining. Make sure the pistachios are finely blended to give a uniform texture throughout the ice cream.
- Once blended, pour the mixture carefully into a freezer-safe container. Use a spatula to spread it evenly and smooth the top so that it freezes uniformly.
- Cover the container with a lid or plastic wrap, and place it in the freezer for 4–6 hours. For the best results and a firmer texture, freezing overnight is recommended.
- When ready to serve, remove the ice cream from the freezer and allow it to sit at room temperature for 15–20 minutes. This helps it soften slightly, making scooping easier without affecting the creamy texture.
- Finally, scoop the ice cream into bowls, dessert glasses, or cones. For extra flavor and crunch, sprinkle with additional chopped pistachios before serving. Each scoop will be rich, creamy, and perfectly nutty.
Notes
- Full-fat cottage cheese works best for a creamier, richer texture. Low-fat versions may result in a slightly less smooth ice cream.
- Freeze for at least 4–6 hours, or overnight for a firmer, scoopable ice cream.
- Keep the ice cream in a tightly sealed container to avoid freezer burn and preserve flavor. Consume within 1–2 weeks for best results.
- The blended base can be prepared a day in advance and stored in the refrigerator before freezing.