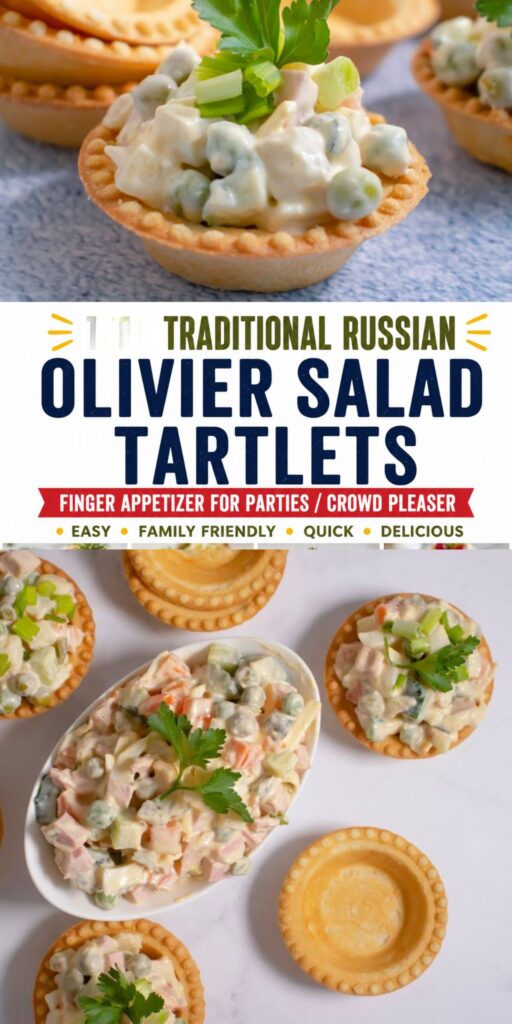
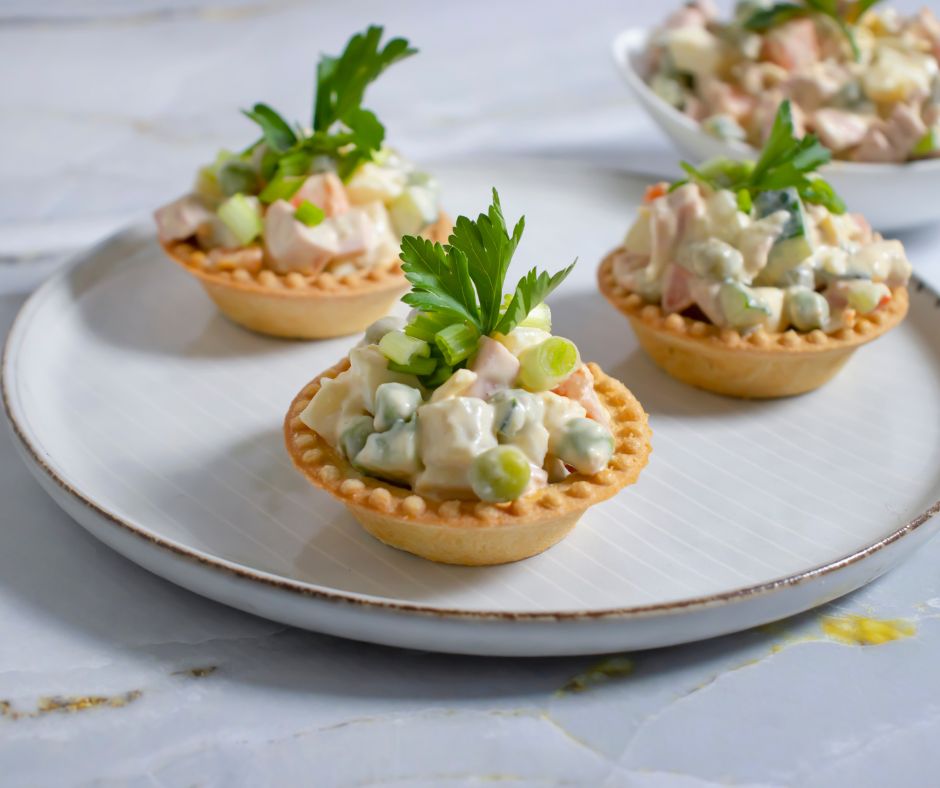
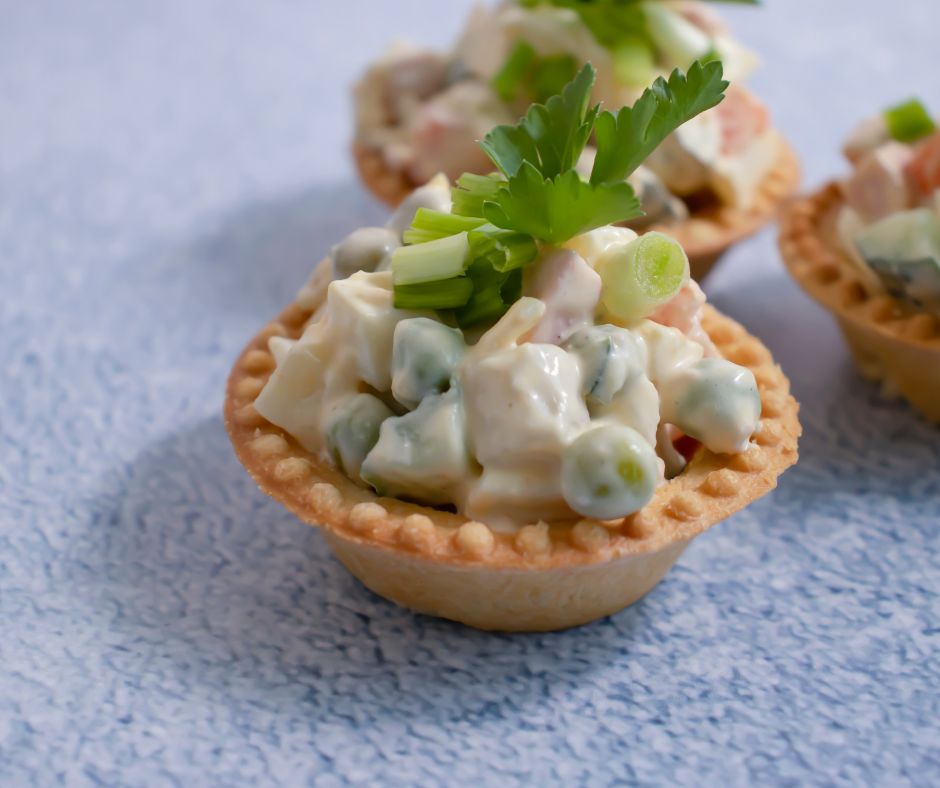
If you are looking for a crowd-pleasing appetizer that looks impressive but takes very little effort, these Traditional Olivier Salad Tartlets are exactly what you need.
Classic Russian Olivier salad is packed with simple ingredients that are spooned into crispy ready-made tartlet shells and finished with a garnish that makes every single one look like it came from a catering table.
They disappear at every party, every time.
The best part? Because you are using store-bought tartlet shells, the filling is the only thing you need to make from scratch — and even that comes together in under 20 minutes.
These are perfect for holiday parties, baby showers, New Year’s celebrations, potlucks, and any gathering where you want something elegant without spending hours in the kitchen.
If you love easy make-ahead party food, you will also want to check out these 30 Make Ahead Finger Sandwich Ideas and these 36 Party Food Platter Ideas for more crowd-pleasing inspiration.
What Is Olivier Salad?
Olivier salad (also called Russian salad or salade Olivier) is one of the most beloved cold salads in Eastern European and Middle Eastern cuisine.
It was created in the 1860s by Lucien Olivier, a Belgian chef working in Moscow, and has been a staple of celebration tables ever since.
Today it is served at New Year’s Eve parties, weddings, and family gatherings across Russia, Ukraine, Iran, Turkey, and beyond.
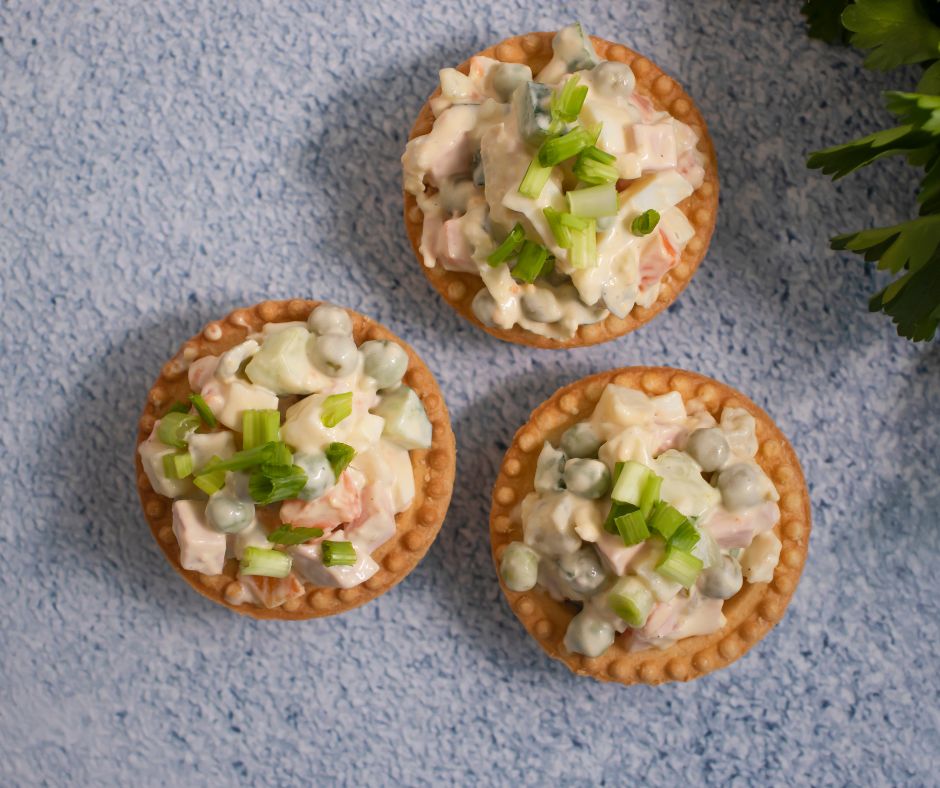
The classic version combines boiled potatoes, carrots, eggs, pickles, peas, and either boiled chicken or bologna-style sausage, all bound together with creamy mayonnaise.
Why You Will Love This Recipe
- No tartlet baking required. Ready-made tartlet shells from the supermarket save you at least an hour of prep work and stay perfectly crispy.
- Make-ahead friendly. The filling can be made up to 2 days in advance and kept in the fridge. Assemble the tartlets just before serving.
- Feeds a crowd easily. One batch of filling fills 24–30 tartlets depending on size — enough for a whole party table.
- Universally loved. Creamy, hearty, and familiar — this is the kind of food that gets people asking for the recipe immediately.
- Beautiful presentation. Each tartlet is a perfect individual serving. No slicing, no serving spoons, no mess.
Ingredients
For the Olivier Salad Filling (makes enough for 24–30 tartlets)
- 3 medium potatoes (about 400g), boiled and cooled
- 2 medium carrots, boiled and cooled
- 4 large eggs, hard-boiled and cooled
- 200g (7 oz) cooked chicken breast, or bologna-style beef/chicken sausage
- 4–5 medium dill pickles (gherkins), finely diced
- 1 cup (150g) frozen peas, thawed (or canned peas, drained)
- 1 small white onion or 4 spring onions, finely chopped
- ¾ cup (180g) good quality mayonnaise
- 1 teaspoon Dijon mustard (optional but recommended)
- Salt and black pepper to taste
- 1 tablespoon pickle brine (from the jar — adds brightness)
For Assembly
- 24–30 ready-made mini tartlet shells (savoury, unsweetened — available in the baking or cracker aisle of most supermarkets)
For Garnish (choose one or mix)
- Fresh dill sprigs
- Thin slices of pickle or cornichon
- A small cube of boiled carrot or egg
- Half a green olive
- Paprika dusted lightly over the top
- A small curl of spring onion
Step-by-Step Instructions
Step 1 — Boil and Cool Your Ingredients (Do This the Day Before)
Place the potatoes and carrots (unpeeled) in a pot of cold salted water. Bring to a boil and cook for 25–30 minutes until a knife slides in easily.
Add the eggs to a separate pot of boiling water and cook for 10–12 minutes for fully hard-boiled yolks. Transfer everything to a bowl of ice water to stop the cooking and cool quickly.
Once cooled completely, peel the potatoes, carrots, and eggs.
Refrigerate until you are ready to assemble — chilling the vegetables overnight gives the best texture.
Step 2 — Dice Everything Uniformly
Cut the potatoes, carrots, eggs, chicken (or sausage), and pickles into small, even dice — roughly ½ cm cubes.
Uniform cutting is the secret to a beautiful Olivier salad because every forkful (or tartlet scoop) has a little bit of everything.
Step 3 — Combine the Filling
Add all the diced ingredients into a large mixing bowl along with the peas. In a small bowl, whisk together the mayonnaise, Dijon mustard, and pickle brine until smooth.
Pour the mayonnaise dressing over the salad and fold gently with a spatula until everything is evenly coated. Season generously with salt and black pepper.
Step 4 — Chill the Filling
Cover the bowl tightly with plastic wrap and refrigerate for at least 1 hour, or overnight.
Step 5 — Fill the Tartlets
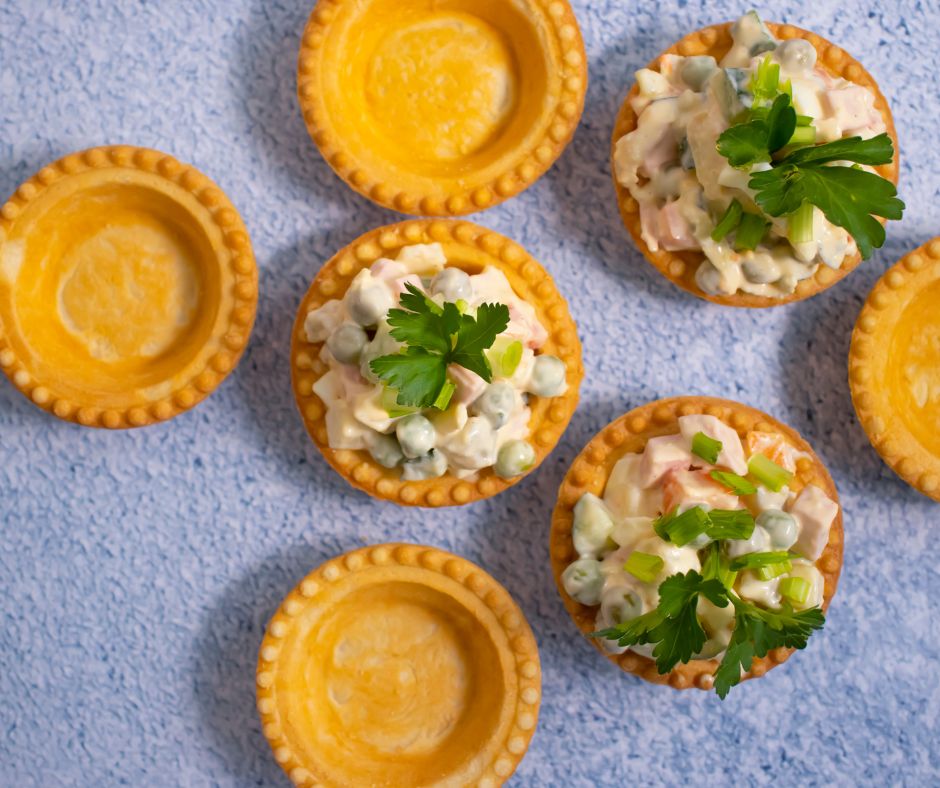
Remove the tartlet shells from their packaging just before serving — do not fill them too far in advance or the shells will lose their crispiness.
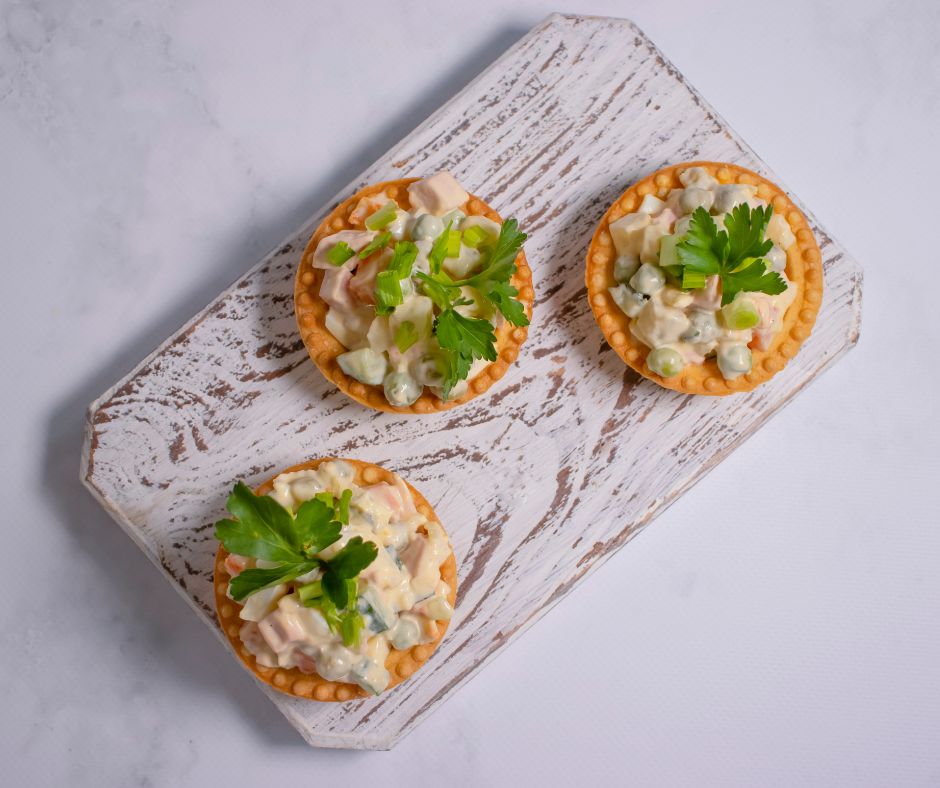
Using a small spoon, fill each tartlet shell generously with the Olivier salad, pressing lightly to pack it in and mounding it slightly above the rim for a full, beautiful look.
For a more professional finish, use a piping bag fitted with a wide round tip to pipe the filling in a neat dome shape.
Step 6 — Garnish and Serve
Place a small garnish on top of each filled tartlet. A single dill sprig, a tiny pickle slice, or a small piece of egg or carrot are all traditional and beautiful.
Arrange on a platter and serve immediately, or refrigerate for up to 1 hour before serving. Beyond 1 hour, the shells begin to soften from the moisture in the filling.
Tips for the Best Olivier Salad Tartlets
Always chill your vegetables before dicing
Warm or even room-temperature potatoes will crumble when you try to dice them. Always refrigerate your boiled vegetables for at least 2 hours before cutting. Cold potatoes dice cleanly and hold their shape in the salad.
Use full-fat mayonnaise
Low-fat mayonnaise is too watery for this recipe and will make the filling loose and wet. Full-fat mayonnaise gives the filling its characteristic creamy, rich binding that holds together in the tartlet shells without spilling.
Do not overfill
Mound the filling just above the rim of the tartlet shell. Overfilling makes them difficult to pick up and eat in one bite — which defeats the whole purpose of a tartlet. Aim for a generous but neat scoop.
Fill as close to serving as possible
Ready-made tartlet shells are crispy because they have very low moisture content. The moment filling goes in, moisture starts transferring from the salad to the shell.
Fill maximum 30–45 minutes before serving for the best texture contrast between creamy filling and crispy shell.
Make the filling up to 48 hours ahead
The Olivier filling actually improves after a night in the fridge. The flavours deepen and the mayonnaise coats everything more evenly. Make it Saturday for a Sunday party — you will thank yourself.
Use a piping bag for events and special occasions
If presentation matters — a wedding, a holiday table, a formal party — pipe the filling instead of spooning it.
A Wilton 1A round tip gives a perfect smooth dome every time. It takes only a few minutes extra and the difference in appearance is significant.
How to Serve Olivier Salad Tartlets
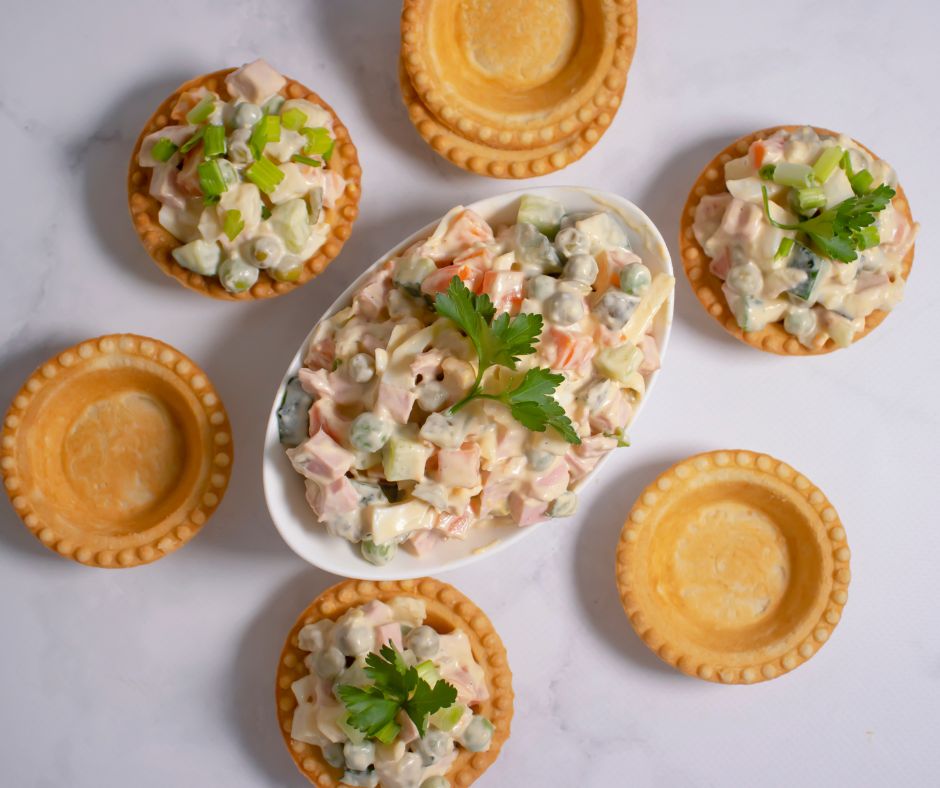
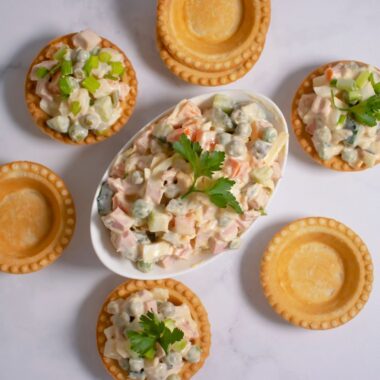
Arrange them in neat rows on a rectangular serving platter for maximum visual impact. A round platter works beautifully too — place one tartlet in the centre and arrange the rest in concentric circles around it.
Scatter fresh dill over the platter and add a few whole pickles or olives around the edges as decoration.
These tartlets pair beautifully with other cold finger foods. If you are building a full party spread, they go especially well alongside a cheese and charcuterie board.
For more party table inspiration, check out these 36 Party Food Platter and Snack Tray Ideas — there is something for every type of gathering.
More Party Appetizer Ideas You Will Love
If these Olivier Salad Tartlets are going on your party table, here are more FlavorfulPinch recipes that pair beautifully with them:
- 30 Make Ahead Finger Sandwich Ideas for Parties and Picnics — perfect alongside tartlets on a party spread
- 36 Party Food Platter Ideas to Feed a Crowd — build a full grazing table around your tartlets
- 23 Easy Crockpot Party Food Ideas for a Crowd — warm dishes that complement cold tartlets perfectly
- Top Crowd-Pleasing Game Day Finger Foods — more bite-sized ideas for any gathering
Traditional Russain Olivier Salad Tartlets
Ingredients
For the Olivier Filling:
- 3 medium potatoes about 400g, boiled, cooled and peeled
- 2 medium carrots boiled, cooled and peeled
- 4 large eggs hard-boiled and cooled
- 200 g 7 oz cooked chicken breast or bologna-style beef/chicken sausage
- 4 –5 medium dill pickles gherkins, finely diced
- 1 cup 150g frozen peas, thawed, or canned peas well drained
- 1 small white onion or 4 spring onions, finely chopped
- ¾ cup 180g full-fat mayonnaise
- 1 teaspoon Dijon mustard
- 1 tablespoon pickle brine from the jar
- Salt and black pepper to taste
For Assembly and Garnish:
- 24 –30 ready-made mini savoury tartlet shells
- Fresh dill sprigs for garnish
- Thin pickle slices small egg cubes, or olive halves for garnish
- Paprika for dusting optional
Instructions
- Boil the vegetables and eggs. Place unpeeled potatoes and carrots in a pot of cold salted water. Boil 25–30 minutes until a knife slides in easily. Hard-boil eggs separately for 10–12 minutes. Transfer all to ice water to cool. Peel and refrigerate until ready. This can be done the day before.
- Dice everything uniformly. Cut potatoes, carrots, eggs, chicken or sausage, and pickles into small even dice about ½ cm. Chop the onion as finely as possible. Uniform cutting ensures every tartlet has a little of everything.
- Make the dressing. Whisk together mayonnaise, Dijon mustard, and pickle brine in a small bowl until smooth.
- Combine the filling. Add all diced ingredients and peas to a large bowl. Pour the dressing over and fold gently until everything is evenly coated. Season well with salt and black pepper. Taste and adjust.
- Chill the filling. Cover with plastic wrap and refrigerate at least 1 hour or overnight. This firms up the filling and deepens the flavour. Do not skip this step.
- Fill the tartlet shells. Remove shells from packaging just before serving. Using a small spoon or piping bag, fill each shell generously, mounding slightly above the rim.
- Garnish and serve. Top each tartlet with a small dill sprig, a pickle slice, or a tiny piece of egg. Arrange on a platter and serve. Fill no more than 30–45 minutes before serving to keep shells crispy.
Notes