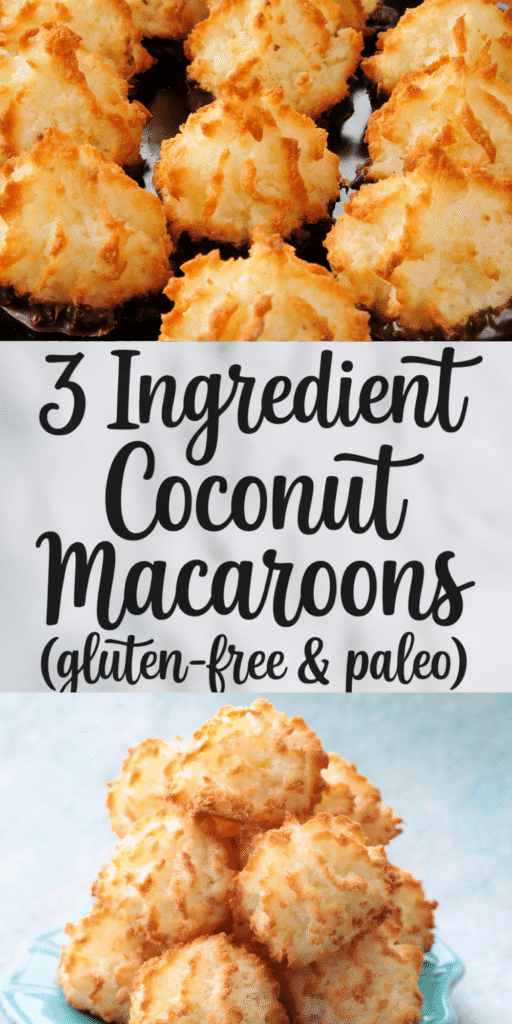
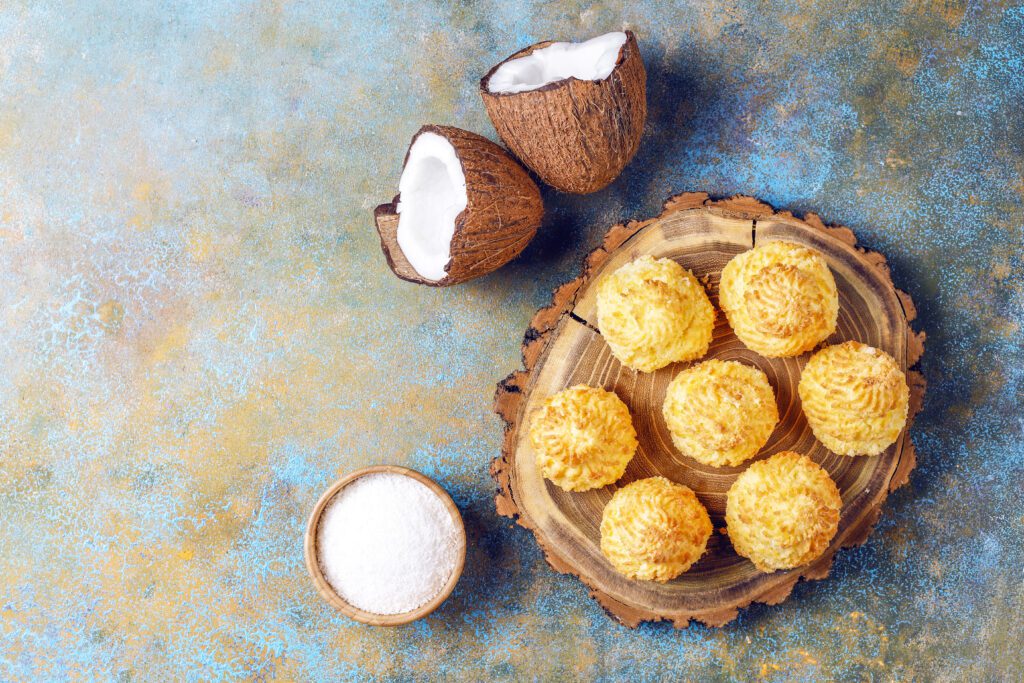
If you enjoy simple, wholesome treats that support a clean-eating lifestyle, these coconut macaroons are a great choice. They’re made with only three ingredients, naturally sweetened, and fit perfectly into gluten-free, paleo, and low-carb routines without sacrificing flavor or texture.
Each bite offers the natural benefits of coconut, including healthy fats for energy and fiber for better satiety.
With no flour or artificial sugars, they’re a nourishing alternative to traditional cookies — light, chewy, and satisfying enough to curb sweet cravings in a healthier way.
They’ve also become one of my favorite quick desserts, especially on busy days when I want something homemade without spending much time or money.
I make them for snacking, sharing, or meal-prep treats; they always prove that simple ingredients can create something delicious, comforting, and good for the body.
Exactly What You'll Need
3 1/4 cups (10 oz/300g) shredded coconut
3/4 cup (7oz/225g) sweetened condensed milk
1/2 cup (3oz/90g) chocolate, melted
These three ingredients form the base of the recipe. Nothing else is required to make the macaroons (though as you’ll see later, you can add a few optional extras if you want to get creative).
Tools You Need
- Mixing bowl
- Spoon or spatula (for mixing)
- Measuring cups and spoons
- Baking sheet or tray
- Parchment paper or silicone baking mat
- Oven
- Small ice cream scoop or tablespoon (for portioning macaroons)
- Cooling rack
- Microwave-safe bowl or double boiler (for melting chocolate, if drizzling or dipping)
- Small serving plates or mini cupcake liners (optional, for presentation)
- Airtight container (for storage)
How to Make the Macaroons?
- Preheat your oven to 350 °F (180 °C) and line a large cookie sheet with parchment paper or a Sil‑pat mat.
- In a medium bowl, combine the shredded coconut and sweetened condensed milk. Mix with a spoon until the coconut and milk are completely mixed. The mixture will be sticky but not too wet.

- Use a tablespoon or a 2‑tablespoon measure to scoop out portions of the coconut mixture and place on the cookie sheet about 1 inch apart. No need to worry about spreading.
- Gently form each mound into a rounded “macaroon” shape. Bake until the tops are golden brown, about 15‑20 minutes.
- Remove from the oven and allow to cool slightly. Once cooled, dip the bottom (or the top) of each macaroon in the melted chocolate.
Set aside on a wire rack to allow the chocolate to firm up. Once cooled, store in an airtight container for up to 4 days.


More Healthy Snacks – MUST TRY!!
15 Sugar Free Snacks and Treats On The Go: Your Complete Guide to Guilt-Free Eating
Healthy Carrot Apple Cabbage Coleslaw Recipe with Creamy Dressing
Carnivore Chili: The BEST Recipe (Zero Carbs)
Nutritional Snapshot (Estimated per Macaroons)
| Nutrient | Amount |
|---|---|
| Calories | ~ 110‑130 kcal |
| Total Fat | ~ 5‑6 g |
| Saturated Fat | ~ 3‑4 g |
| Carbohydrates | ~ 12‑14 g |
| Sugar | ~ 10‑12 g |
| Protein | ~ 1‑2 g |
| Fiber | ~ 1‑2 g |
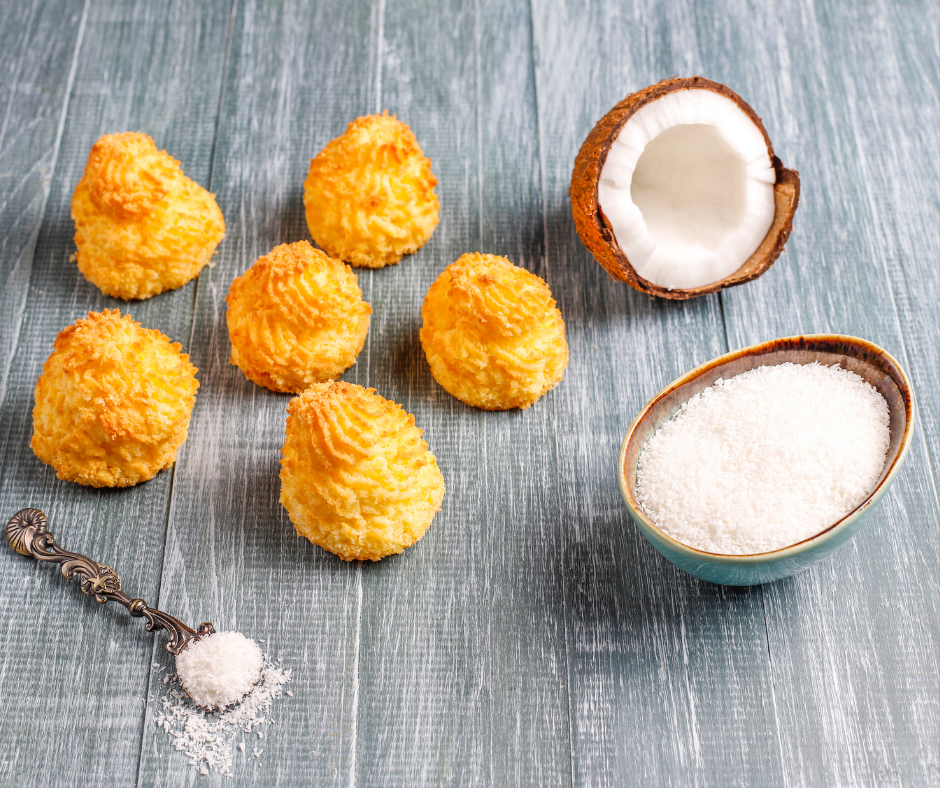
Party-Pleaser Coconut Towers
Take your coconut macaroons to the next level by shaping them into taller, tower-like mounds instead of the usual flat or rounded shapes. This simple change makes them look elegant and eye-catching, perfect for any dessert table.
Chocolate Drizzle: Melt some chocolate and drizzle it over the tops in a playful zig-zag pattern. This adds flavor and makes each tower look extra special.
Sparkle and Crunch: Sprinkle a little edible gold dust or lightly toasted coconut flakes over the chocolate. The gold dust adds a festive shimmer, while the coconut flakes give a satisfying crunch.
Presentation Tip: Arrange the towers on a pretty plate or cake stand. You can place them close together to form a mini dessert display that looks impressive with minimal effort.
Serving Idea: These towers are perfect for parties, brunch boards, or special occasions. Guests will enjoy both the taste and the way they look.
Travel-Friendly Snack Bites
These snack bites are perfect for busy days when you need something tasty and convenient. You can make them ahead of time and keep them fresh in an airtight container. They are ideal for packing in lunchboxes, taking on a picnic, or keeping in your bag for a quick, energizing snack wherever you are.
Make Ahead: Prepare the bites in advance so you always have a ready-to-go snack on hand.
Easy to Pack: Their small size makes them perfect for lunchboxes, picnic baskets, or even a handbag or backpack.
On-the-Go Energy: These bites are a great pick-me-up during a busy day, offering a balance of flavor and nutrition in a compact form.
Versatile Serving: Enjoy them as a quick breakfast, an afternoon snack, or even a light dessert after a meal.
Chocolate & Coffee
Make your dessert feel special with this easy, elegant idea. Use dark chocolate with at least 70 % cocoa for a rich, deep taste that goes well with wine or cheese. Sprinkle a few sea salt flakes on top to bring out the chocolate flavor and add a little crunch.
Place the treats on a slate or wooden board to make them look extra fancy. Serve with a shot of hot espresso to balance the sweetness and leave your guests with a small but satisfying treat.
- Use good-quality dark chocolate for the best taste.
- A pinch of sea salt adds flavor and a little crunch.
- Present on a slate, wooden board, or small plate for a neat look.
- Serve with espresso or dessert wine for a complete finish.

Guilt-Free Bite-Sized Coconut Treats
These mini macaroons are a sweet treat that you can enjoy without feeling too indulgent. Use a small scoop, about half a tablespoon, to make each macaroon bite-sized. This keeps the portions small but still lets you enjoy the rich coconut flavor and any toppings you like, such as a drizzle of chocolate or a sprinkle of nuts.
For a fresh and colorful touch, serve each mini macaroon with a few berries or a small mint leaf on top. You can also place them in mini cupcake liners or arrange them neatly on a plate to make them look more inviting. The smaller size means you can have a few bites when you want a little dessert, but without going overboard.
These treats are perfect for parties, lunchboxes, or a quick snack at home. They are easy to make ahead of time and store in an airtight container, so you always have a light, delicious option ready when you want a sweet bite.
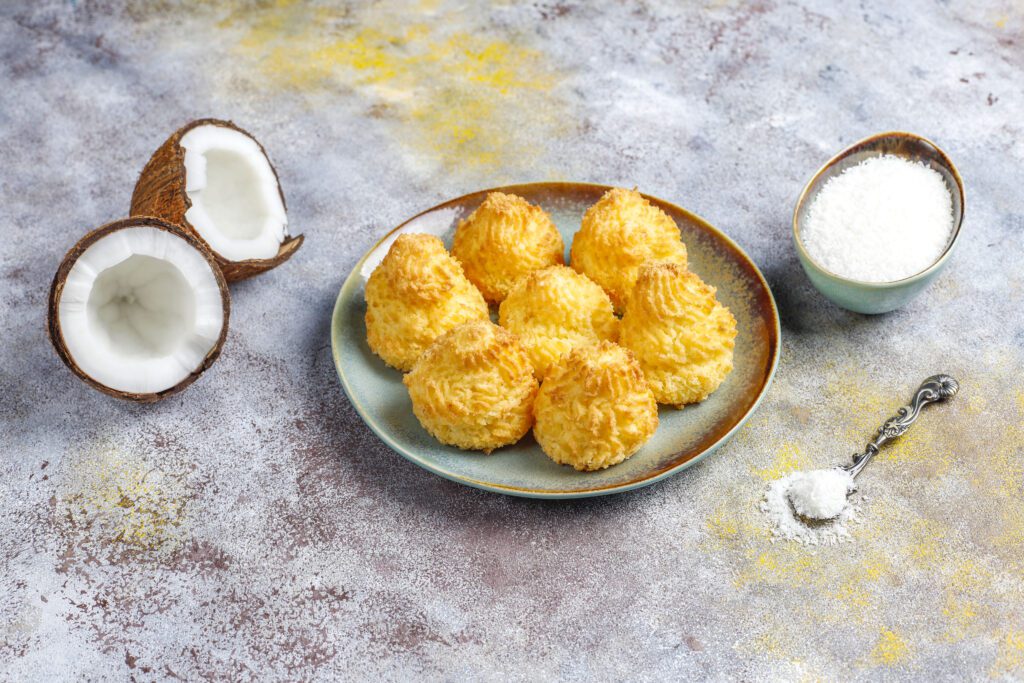
Serving and Storage Tips To Make Them Better
- Arrange the macaroons neatly on a serving plate to make them look extra appealing.
- Add a small sprinkle of extra toasted coconut or a drizzle of chocolate just before serving for a fresh, decorative touch.
- Use mini cupcake liners for individual servings, perfect for parties or gift boxes.
- Keep them away from direct sunlight or heat to maintain texture and prevent chocolate from melting.
- If transporting, layer them with parchment paper in a sturdy container to avoid sticking or breaking.
- Reheat gently in a warm oven for 2–3 minutes if you want that just-baked, soft texture.
- Pair with fresh berries, a mint leaf, or a small dollop of whipped cream for a more elegant presentation.
- For a fun twist, dust lightly with powdered sugar or cocoa powder right before serving.
Variations Ideas to Make It Your Own
- Swap the dark chocolate for white chocolate and sprinkle crushed dried raspberries on top. This adds a sweet, fruity twist and makes the macaroons look colorful.
- Add half a teaspoon of almond extract to the coconut-milk mixture for a gentle nutty flavor that blends beautifully with the coconut.
- Mix in a quarter cup of finely chopped pecans or almonds into the coconut mixture before baking. This adds a crunchy texture and a delicious nutty taste.
- Instead of dipping in chocolate, drizzle caramel or coconut caramel over the macaroons and sprinkle a little sea salt on top. This creates a sweet-and-salty version that feels indulgent.
- For a mocha version, stir half a teaspoon of espresso powder into the melted chocolate before dipping. This adds a rich coffee flavor that’s perfect for adults or coffee lovers.
Kid-Friendly Dipped Treat
Turn your macaroons into a fun treat that kids will love. Let children dip half of each macaroon into colorful candy melts instead of chocolate.
This makes the cookies bright, playful, and perfect for little hands. Use fun cupcake liners or paper cups to serve them, which adds to the excitement and keeps them neat. These treats are ideal for birthday parties, playdates, or anytime you want a cheerful snack that feels special.
- Let kids get involved in dipping for a fun activity.
- Use different colors of candy melts to make a rainbow of treats.
- Sprinkle tiny candies or edible glitter on top before the coating sets for extra fun.
- Arrange on a colorful plate or in mini boxes for a festive presentation.
- These treats are small, easy to eat, and perfect for little hands, making snack time exciting and mess-free.
Why These Work for All Occasions
Breakfast treat? Snack? Dessert? Because these macaroons sit in the sweet spot. They’re portable, not overly large, and you can scale the batch up or down. Need something quick for guests? Done. Want a treat after your workout? Light enough for that. Trying to impress someone with minimal effort? This is it.
I especially love serving them when friends drop by unexpectedly, they look polished and delicious, but really I spent only minutes prepping. That’s a win in my book.

3 Ingredient Coconut Macaroons (Gluten-Free & Paleo)
Course: Dessert18
servings10
minutes15
minutes25
minutesIngredients
3 ¼ cups (10 oz / 300 g) shredded coconut
¾ cup (7 oz / 225 g) sweetened condensed milk
½ cup (3 oz / 90 g) chocolate, melted
Directions
- Set your oven to 350 °F (180 °C) and line a cookie sheet with parchment paper. Preheating ensures that the macaroons start baking immediately and evenly. The parchment paper prevents sticking and makes cleanup much easier, while also helping the bottoms stay golden without burning.
- In a medium mixing bowl, add the shredded coconut and sweetened condensed milk. Use a spatula or spoon to stir until all the coconut is fully coated and the mixture is sticky and slightly glossy. This binding is essential — it holds the macaroons together during baking so they don’t fall apart. Make sure to scrape the sides and bottom of the bowl to incorporate any coconut that may stick.
- Using a tablespoon or 2-tablespoon scoop, portion the mixture onto the prepared cookie sheet, leaving about 1 inch between each mound. This spacing allows heat to circulate around each macaroon, helping them bake evenly. Gently shape each mound into a rounded “macaroon” by pressing lightly with your fingers or the back of the spoon. Avoid pressing too hard — you want them to stay slightly airy and rounded, not flat.
- Place the cookie sheet in the preheated oven and bake for 15–20 minutes. The macaroons are done when the tops are lightly golden brown and the edges are slightly firmer. Baking times may vary depending on your oven, so check carefully toward the end to prevent over-browning. The coconut will crisp slightly while the inside stays chewy.
- Remove the macaroons from the oven and let them cool on the cookie sheet for 5–10 minutes. This allows them to firm up slightly, making them easier to handle. Then transfer to a wire rack if desired.
- Melt chocolate in a microwave or double boiler until smooth. Dip the bottom, top, or half of each macaroon into the chocolate, letting excess drip off. Place them back on the wire rack or parchment-lined sheet to set. For quicker results, you can refrigerate for a few minutes until the chocolate firms.
- Once fully cooled and the chocolate has set, store the macaroons in an airtight container. They will keep well at room temperature for up to 4 days, maintaining a chewy interior and slightly crisp edges. You can also refrigerate them to extend freshness, but allow them to come to room temperature before serving for the best texture.
Notes
- Preheat and line pan: Ensures even baking and prevents sticking; parchment helps maintain golden bottoms.
- Spacing matters: Leave about 1 inch between mounds so heat circulates evenly, producing a lightly crisp exterior and chewy interior.
- Storage: Store in an airtight container at room temperature for up to 4 days; refrigerate to extend freshness but bring to room temperature before serving.
- Chocolate coating: Dip after cooling slightly; let excess drip off and set at room temperature or in the fridge.