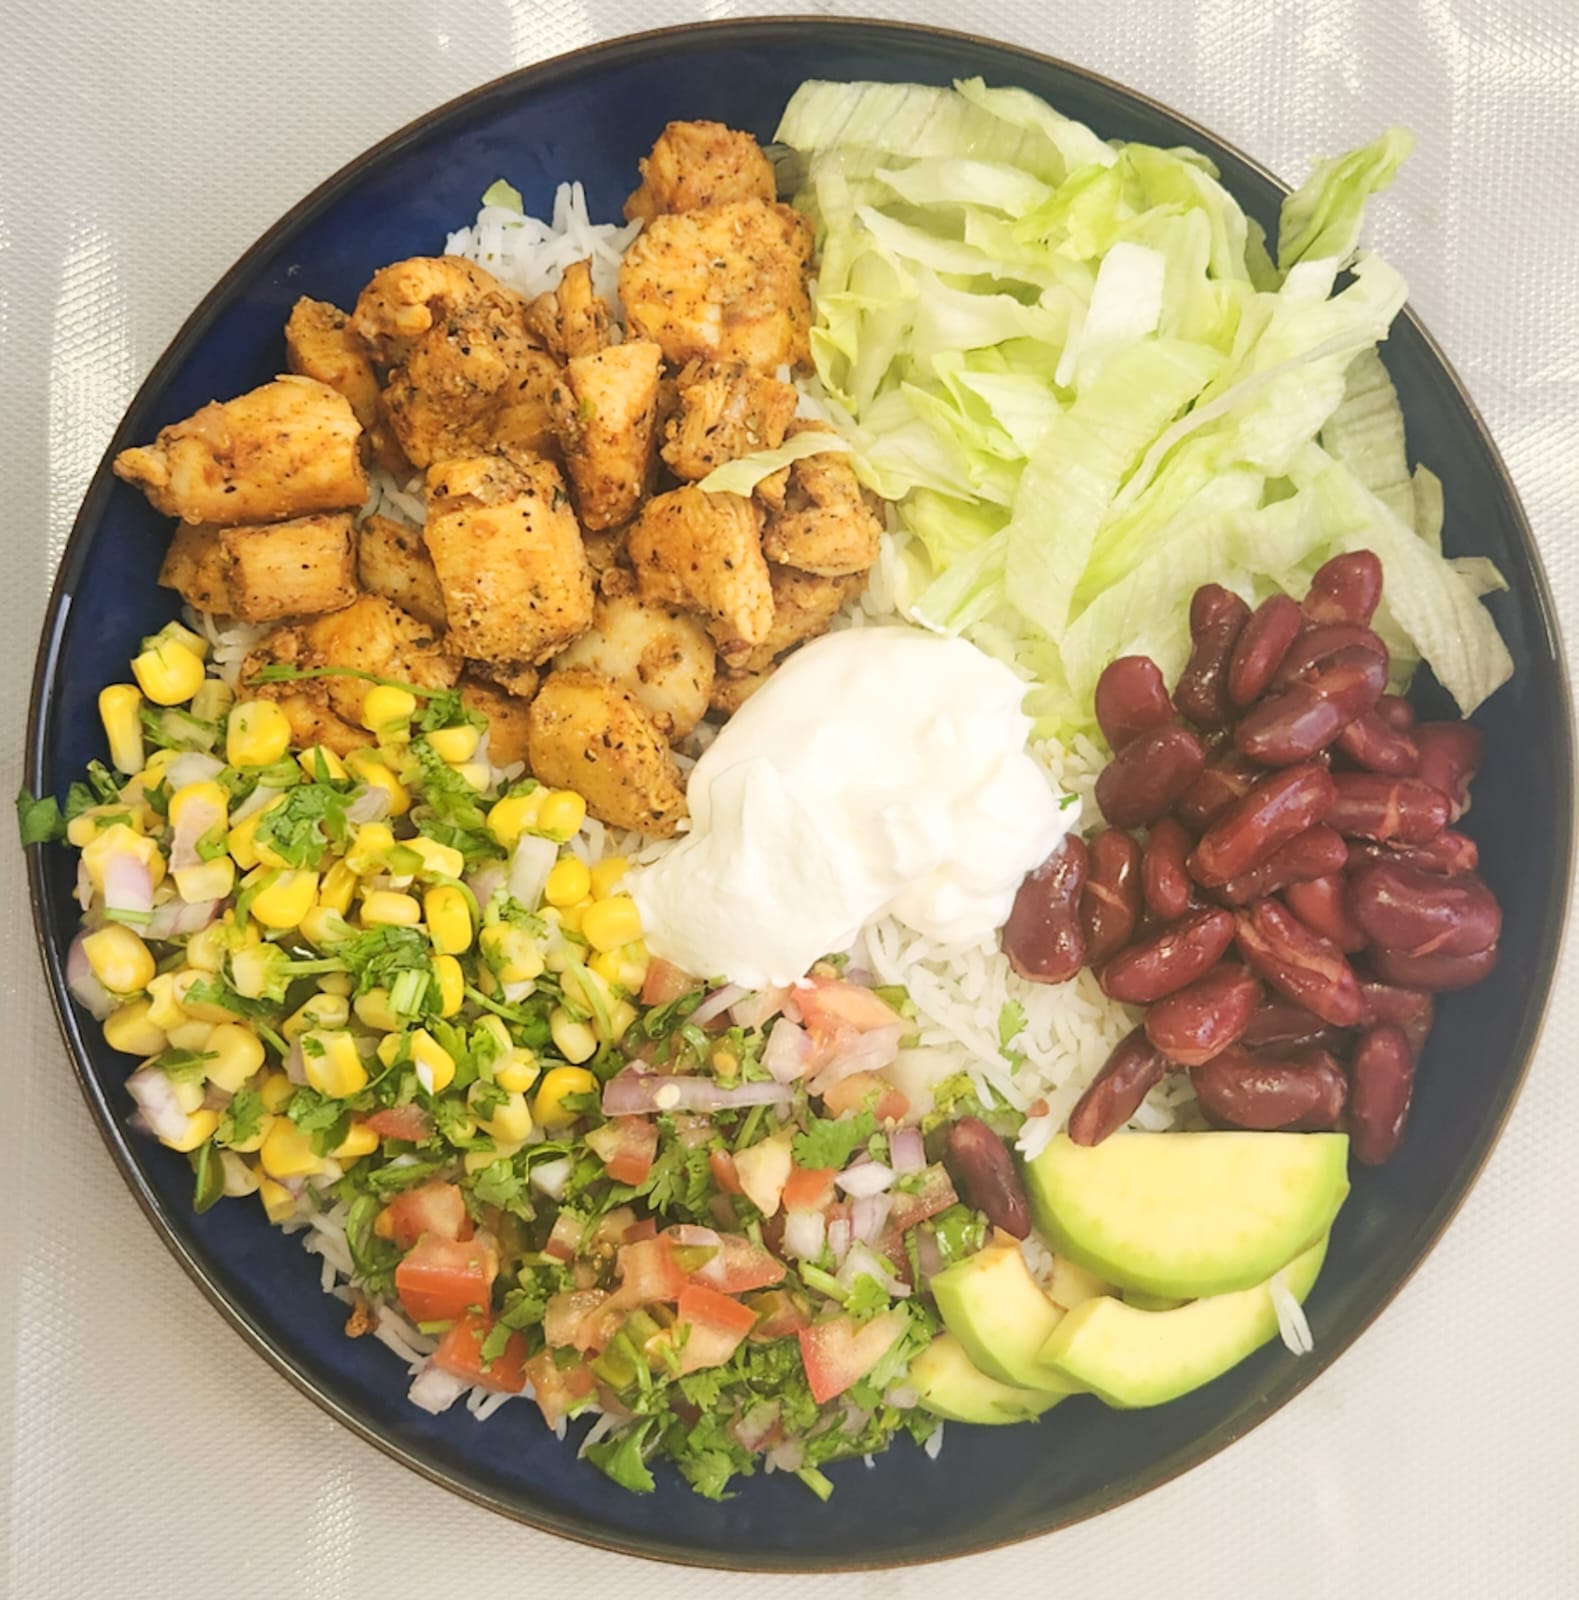
Nothing beats easy lunches you can make on a tight budget — especially when every recipe is quick, simple, and perfect for busy days! These cheap lunch ideas are ideal when you need Easy Lunches To Take To Work, budget meals for the whole family, or Cold Lunch Ideas For Adults that require zero reheating.
Each recipe is designed to be practical and quick, using everyday ingredients to create easy lunch recipes that are filling and balanced. Many of these meals include lean proteins, fresh vegetables, and whole grains, making them healthy cheap lunches that support energy, focus, and overall well-being.

Perfect for packing lunches for school, Lazy Lunch Ideas at home, or Simple Lunch Ideas For Work that won’t cost more than meals under $5, this list has something for everyone.
These are the kind of adult lunch ideas for work that save money, save time, and still taste amazing.
Think make-ahead salads, budget-friendly wraps, high-protein bowls, cold pasta lunches, and filling recipes you can meal-prep for the entire week without overspending.
Perfect for families, office workers, busy moms, college students, and anyone who wants delicious food without the high price tag.
If you’re looking for budget-friendly meals, frugal lunches, and flavorful dishes that stretch your ingredients further, these are the cheap lunch ideas you’ll make again and again!
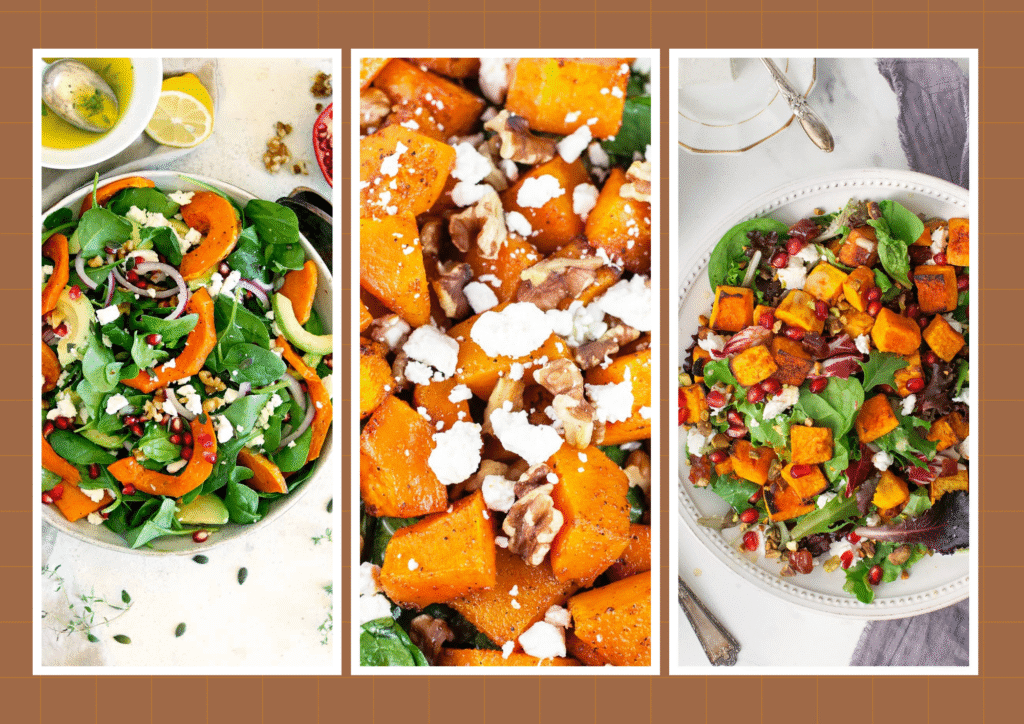
1. Butternut Squash Feta Salad
This salad is a perfect combination of sweet, savory, and tangy flavors, making it an easy, impressive, and budget-friendly lunch. Roasted butternut squash brings natural sweetness and vibrant color, while arugula adds a fresh, crisp bite.
Toasted walnuts provide crunch and healthy fats, and creamy feta adds a salty counterpoint. It’s simple, wholesome, and packed with nutrients, perfect for work lunches or a light weekend meal.
Ingredients
- 1 medium butternut squash (about 2 lb), peeled and cubed
- 1 tablespoon olive oil
- Salt and black pepper, to taste
- 6 cups arugula, torn or chopped
- ½ cup crumbled feta cheese
- ½ cup toasted walnuts
- 2 tablespoons balsamic vinegar
- 1 tablespoon honey
- 1 teaspoon Dijon mustard
- 3 tablespoons olive oil (for dressing)
How to Make It?
- Preheat the oven to 200°C (400°F) so it’s ready for roasting the squash evenly. A hot oven helps the squash caramelize on the edges while staying tender inside.
- Peel (if desired) and cube the squash into uniform pieces. Toss the cubes with 1 tablespoon of olive oil, salt, and black pepper until they are lightly coated. Spread them in a single layer on a baking sheet to ensure they roast rather than steam.
- Roast the squash in the oven for 25–30 minutes, flipping the cubes halfway through. Roast until the edges are golden brown and the squash is tender when pierced with a fork.
- While the squash is roasting, prepare a large serving bowl with a generous handful of arugula. Its peppery flavor provides a perfect balance to the sweetness of the roasted squash.
- Lightly toast the walnuts in a dry skillet over medium heat for 3–5 minutes, stirring occasionally. Toasting brings out their natural oils and adds a fragrant crunch to the salad.
- In a small bowl, whisk together 2 tablespoons balsamic vinegar, 1 teaspoon honey, 1 teaspoon Dijon mustard, and 3 tablespoons olive oil. Taste and adjust seasoning with salt and pepper as needed; a touch more honey can enhance sweetness, while extra vinegar can add tang.
- Once the squash is roasted, allow it to cool slightly so it doesn’t wilt the arugula. Combine the roasted squash, toasted walnuts, and crumbled feta cheese with the arugula in the serving bowl.
- Drizzle the prepared dressing over the salad and toss gently to combine, ensuring each piece of squash is coated and the flavors are evenly distributed. Serve immediately for a fresh, colorful, and nutrient-packed salad.
How to Make It Diet-Friendly?
This Butternut Squash Feta Salad can easily fit into a calorie-conscious or weight-management plan with a few simple tweaks:
- Reduce the dressing: Use half the olive oil or substitute with a light vinaigrette to lower calories while keeping flavor.
- Watch the cheese: Opt for a smaller portion of feta or choose a reduced-fat version to cut saturated fat.
- Add more greens: Increase the arugula or add spinach for more volume and fiber, keeping you full without extra calories.
- Boost protein wisely: Add grilled chicken, turkey, or extra tofu instead of high-calorie nuts if needed, for a satisfying, diet-friendly boost.
- Control sweetener: Reduce or skip the honey in the dressing if you want to limit sugar.
Nutrition Highlights
Beta-carotene: The squash is rich in beta-carotene, a powerful antioxidant that supports eye health and immune function.
Protein & Calcium: Feta cheese provides both protein for muscle support and calcium for strong bones.
Healthy Fats: Walnuts contribute heart-healthy omega-3 fatty acids, which support brain and cardiovascular health.
Fiber & Vitamins: Adding quinoa not only increases protein content but also provides fiber and essential B-vitamins for sustained energy.
Flavorful Finishes and Tips
- Best enjoyed warm to enhance the flavors of the squash, or served at room temperature for a lighter, refreshing option.
- For a more substantial meal, stir in cooked quinoa or top with grilled chicken. Both options add a boost of protein and make it more filling.
- Garnish with fresh herbs like parsley or thyme for added aroma and a touch of color.
- Drizzle with a light vinaigrette or olive oil to complement the creamy feta and crunchy walnuts.
Cost Estimate
Total estimated cost: $16.60
Servings: 4–5 servings
Cost per serving: Around $3.30
2. Lemony Green Lentil Soup
This Lemony Green Lentil Soup is bright, comforting, and packed with nutrition. Tender lentils, sweet carrots, and aromatic herbs come together with a zesty lemon dressing for a refreshing taste.
It’s high in protein and fiber, keeping you full and energized. Easy to make and budget-friendly, this soup works perfectly for lunch or a light dinner. You can prep it ahead, store it, and enjoy a healthy meal anytime.
Ingredients
- 1 cup green lentils, rinsed and drained
- 3 cups low-sodium vegetable broth (or chicken broth)
- 1 carrot, peeled and diced
- 2 garlic cloves, lightly crushed
- 2 sprigs fresh thyme (or 1 teaspoon dried thyme)
- 2 sprigs fresh rosemary (or 1/2 teaspoon dried rosemary)
- Salt and pepper to taste
- For the dressing: juice and zest of 1 lemon, 1 tablespoon Dijon mustard, 1/4 cup extra-virgin olive oil, 2 teaspoons chopped fresh thyme (or 1 teaspoon dried), 1/2 teaspoon fine salt, 1/2 teaspoon maple syrup or honey (optional)
Step-by-Step Directions
- Prepare Lentils and Vegetables – Rinse the lentils under cold water to remove any dust or debris. Dice the carrot into small pieces and lightly crush the garlic cloves so they release flavor during cooking.
- Cook the Base – In a medium-sized pot, combine lentils, vegetable broth, diced carrot, garlic, thyme, and rosemary. Turn the heat to medium-high and bring the mixture to a gentle boil.
- Simmer Slowly – Reduce heat to medium-low and cover the pot. Let the soup simmer for about 20-25 minutes or until lentils are tender. Stir occasionally to prevent sticking.
- Remove Herbs and Adjust – Take out the thyme and rosemary sprigs. Taste the soup and add salt or pepper if needed.
- Add Lemon Dressing – In a small bowl, whisk together lemon juice and zest, Dijon mustard, olive oil, chopped thyme, salt, and optional maple syrup. Pour the dressing into the warm soup and stir gently to combine.
- Serve – Serve the soup warm. For extra flavor, add a drizzle of olive oil or a sprinkle of fresh herbs on top.
Protein and Nutrition Breakdown
Nutrition Table (Approximate per 1 cup serving)
| Nutrient | Amount |
|---|---|
| Calories | 210 kcal |
| Protein | 7 g |
| Carbohydrates | 23 g |
| Fiber | 6 g |
| Fat | 10 g |
| Sodium | Depends on broth & added salt |
| Vitamins & Minerals | Iron, folate, vitamin C, antioxidants |
Prep and Storage Tips
- Make Ahead: You can cook the soup a day in advance and store it in an airtight container in the fridge. Add the lemon dressing just before serving to keep flavors fresh.
- Freezing: Cook a large batch and freeze in 1- or 2-cup portions. Thaw overnight in the fridge and reheat gently. Add fresh dressing before serving.
- Consistency Tip: If the soup thickens too much after cooling, stir in a little water or broth when reheating.
- Extra Flavor: Add fresh herbs, a squeeze of lemon, or a spoon of yogurt for creaminess. You can also include other vegetables like spinach or kale for more nutrition.
Cost Estimate
- Green lentils: $1.50
- Vegetable broth: $2.00
- Carrot: $0.50
- Garlic: $0.20
- Lemon: $0.75
- Olive oil, spices, mustard, thyme, rosemary: $1.50 (approximate per serving)
Total approximate cost: $6.45 for 4 servings (~$1.60 per serving)
3. Sweet Potato Rounds With Honey and Feta Bliss

Sweet potato rounds are a perfect sweet-savory combination with slightly crisp edges and tender centers. Feta adds tang and creaminess, while honey enhances the natural sweetness. Quick, inexpensive, and nutrient-dense, this dish is a standout cheap lunch or snack. I love it as a make-ahead dish for busy weekdays.
What You Need
- 2–3 medium sweet potatoes
- 2 tablespoons olive oil
- 2–3 tablespoons honey
- ½ cup crumbled feta cheese
- Salt and black pepper, to taste
- Optional: fresh herbs like thyme or parsley
Directions
- Preheat the oven to 200°C (400°F) and line a baking sheet with parchment paper to prevent sticking and make cleanup easier.
- Slice the sweet potatoes into ½-inch rounds, keeping them as uniform as possible for even cooking. Toss the slices with olive oil, salt, and pepper until they are lightly coated.
- Arrange the rounds in a single layer on the prepared baking sheet and roast for 20–25 minutes, flipping them halfway through. Roast until the edges are golden and the centers are tender when pierced with a fork.
- Once roasted, remove from the oven and drizzle with honey. Sprinkle crumbled feta over the warm rounds and add optional fresh herbs such as thyme or parsley for an aromatic finish. Serve immediately.
Customize Your Rounds Your Way
Give your sweet potato rounds a personal twist with simple ingredient swaps:
- Cheese Swap: Replace feta with goat cheese, ricotta, or blue cheese for a different tang or creaminess.
- Sweetener Swap: Use maple syrup, agave, or a drizzle of balsamic glaze instead of honey to change the flavor profile.
- Herb Variations: Try rosemary, sage, or chives instead of thyme or parsley for an aromatic touch.
- Extra Crunch: Sprinkle toasted nuts or seeds, like walnuts or pumpkin seeds, on top for texture and healthy fats.
- Savory Boost: Add a pinch of smoked paprika, chili flakes, or garlic powder for a subtle kick.
These swaps let you adapt the dish for snacks, lunches, or even party platters, making it as versatile as it is delicious.
Cost Estimate
- 2–3 medium sweet potatoes – $2.50
- 2 tablespoons olive oil – $0.20
- 2–3 tablespoons honey – $0.50
- ½ cup crumbled feta cheese – $2.50
- Salt and black pepper – $0.05
- Optional fresh herbs like thyme or parsley – $0.50
Total estimated cost: $6.25
Servings: 4
Cost per serving: Around $1.55
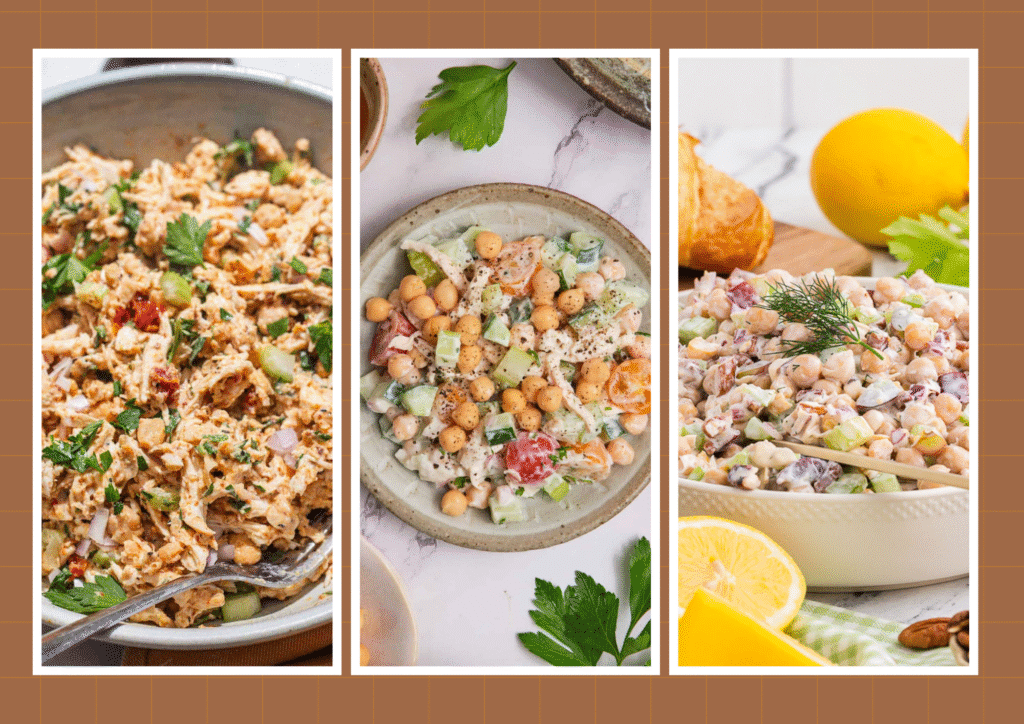
4. Mediterranean Chickpea Salad
This Mediterranean Chickpea Salad is a fresh, vibrant, and protein-packed dish perfect for a healthy lunch or light dinner. Bursting with colorful vegetables, creamy feta, and briny olives, it’s full of flavor and texture. The simple olive oil and lemon dressing ties everything together, making it refreshing yet satisfying. Quick to prepare and naturally vegetarian, it’s a great make-ahead salad for busy days.
Ingredients
- 1 (15‑oz) can chickpeas, drained and rinsed
- 1 cucumber, diced (about 1 medium cucumber)
- 1–2 cups cherry tomatoes, halved or chopped
- 1 red bell pepper, diced
- 1 small red onion, finely chopped
- ½ cup crumbled feta cheese
- ½ cup pitted Kalamata or black olives, sliced or halved
- ¼ cup extra virgin olive oil
- 2–3 tablespoons fresh lemon juice
- Salt and freshly ground black pepper, to taste
- Optional: chopped fresh parsley or other herbs for garnish
Directions
- Prepare the chickpeas: Drain and rinse the canned chickpeas thoroughly under cold water to remove excess sodium. Set aside in a large mixing bowl.
- Chop the vegetables: Dice the cucumber, red bell pepper, and red onion. Halve or chop the cherry tomatoes. Add all vegetables to the bowl with the chickpeas.
- Add feta and olives: Crumble the feta cheese and add it to the salad. Slice or halve the olives and toss them in gently.
- Make the dressing: In a small bowl or jar, whisk together the olive oil, fresh lemon juice, a pinch of salt, and black pepper. Taste and adjust seasoning as needed.
- Combine the salad: Pour the dressing over the chickpea and vegetable mixture. Toss gently but thoroughly so that every ingredient is coated with the dressing.
- Final touches: Taste once more and adjust with extra lemon juice or seasoning if desired. Garnish with chopped fresh parsley or herbs for extra flavor and color.
- Serve: The salad can be served immediately, or chilled in the refrigerator for 30 minutes to let the flavors meld. This also enhances the texture and taste.
Cost Estimate (Approximate)
- Chickpeas (1 can): $0.66 – $1.00
- Cucumber: $0.13 – $0.20
- Red bell pepper: $0.50 – $0.66
- Cherry tomatoes (1–2 cups): $0.50 – $0.83
- Red onion: $0.10 – $0.16
- Feta cheese (½ cup): $0.83 – $1.16
- Kalamata or black olives (½ cup): $0.66 – $1.00
- Olive oil (¼ cup): $0.33 – $0.50
- Lemon juice (1 lemon ≈ 2–3 tbsp): $0.10 – $0.16
- Salt, pepper, herbs: ~$0.06
Estimated total cost: ~$3.87 – $5.77 (for 4–6 servings)
Cost per serving: ~$0.65 – $1.44
5. Country Ranch Green Beans and Potatoes with Chicken
This dish brings together tender chicken, crisp‑tender green beans, and soft, golden potatoes, all baked or simmered together with warm ranch seasoning. It’s a comforting one‑pan meal that fills the kitchen with a cozy aroma, perfect for busy weeknights or a family dinner. The mix of vegetables and chicken keeps it hearty yet balanced.
Ingredients (for ~4 servings)
- 1.5 lb (≈ 4) boneless, skinless chicken breasts, cut into bite-size pieces
- 1 lb baby potatoes, halved or quartered depending on size
- 1 lb fresh green beans, trimmed
- 1 packet (≈ 1 oz / 28 g) dry ranch-dressing seasoning mix (or homemade equivalent)
- 2 tablespoons olive oil (or melted butter)
- Salt and freshly ground black pepper, to taste
- Optional: ¼–½ cup chicken broth
Oven-Baked Method (One-Pan)
- Preheat the oven to 350 °F (≈ 175 °C). Lightly grease a 9×13-inch baking dish with olive oil or butter.
- In a large bowl, combine the halved potatoes, chicken pieces, and trimmed green beans.
- Drizzle the olive oil over the ingredients and sprinkle the ranch seasoning, salt, and black pepper. Toss everything until evenly coated.
- Arrange the potatoes on one side of the pan, the chicken in the center, and green beans on the other side, or mix them together evenly.
- If using chicken broth, pour it around the edges of the pan to keep the ingredients moist.
- Cover the pan with aluminum foil and bake for 55–65 minutes, or until chicken is cooked through (internal temperature 165 °F / 74 °C) and potatoes are tender.
- Remove foil during the last 10 minutes of baking if you want a slightly crispier top.
- Let the dish rest for 5 minutes before serving. Serve warm.
Skillet / Stove-Top Method
- Heat a large skillet or oven-safe pan over medium heat. Add olive oil or butter.
- Add the chicken pieces, season with salt and pepper, and sauté until lightly browned (about 5–7 minutes).
- Add halved/quartered potatoes to the skillet and stir to combine with the chicken.
- After a few minutes, add the trimmed green beans.
- Sprinkle ranch seasoning evenly over the mixture and stir to coat everything.
- If desired, add ¼–½ cup chicken broth to prevent drying and help cook the potatoes evenly.
- Reduce the heat to low, cover the pan, and let simmer for 20–25 minutes, stirring occasionally, until chicken is fully cooked and potatoes are tender.
- Taste and adjust salt and pepper if needed. Serve hot.
Substitutions and Swaps
- Chicken: Can be swapped with turkey breast or boneless skinless thighs.
- Potatoes: Use Yukon gold, red, or sweet potatoes for a different flavor or texture.
- Green beans: Substitute with asparagus, broccoli, or zucchini if preferred.
- Ranch seasoning: Use garlic powder, onion powder, dried herbs, or a low-sodium version for a healthier option.
- Olive oil / butter: Can swap with avocado oil or ghee for a different taste profile.
Cost Estimate
- Chicken (1.5 lb): $7–9
- Baby potatoes (1 lb): $1–2
- Green beans (1 lb): $2–3
- Ranch seasoning (1 oz): $1–2
- Olive oil (2 tbsp): $0.33–0.50
- Chicken broth (optional ¼–½ cup): $0.25–0.50
- Salt, pepper, optional herbs: ~$0.10
Estimated total cost: ~$11–17 (for 4 servings)
Cost per serving: ~$2.75
6. Easy Refried Beans From Canned Beans
This refried‑beans recipe turns simple canned beans into a creamy, flavourful side dish in under 20 minutes. Aromatic sautéed onion, garlic, and spices give the beans a rich, comforting depth — much better than store‑bought versions. It works well as a dip, taco filling, or a hearty side with rice or tortillas. It’s quick, budget‑friendly, and reliably tasty every time.
Ingredients (for about 4–6 servings)
- 2 (15‑oz) cans pinto beans — drained and rinsed
- 1 tablespoon extra‑virgin olive oil (or vegetable oil / other cooking fat)
- ½ medium onion, finely chopped (≈ ½ cup)
- 2 garlic cloves, minced (or more, to taste)
- ¼ teaspoon salt (adjust to taste)
- ½ teaspoon chili powder (or to taste)
- ¼ teaspoon ground cumin (optional, for extra flavour)
- ½ cup water (or low‑sodium broth), more if needed
- Optional at end: squeeze of fresh lime juice, chopped fresh cilantro, shredded cheese, diced jalapeño or hot sauce — depending on how you plan to serve
Directions
- Warm the oil and cook aromatics: Heat the olive oil in a medium saucepan or skillet over medium heat. Add the finely chopped onion and a pinch of salt, cooking until the onion is soft and translucent, about 5–8 minutes. Add the minced garlic, chili powder, and cumin (if using) and stir for 30–60 seconds until fragrant, being careful not to burn the garlic.
- Add the beans and liquid: Stir in the drained and rinsed pinto beans along with about ½ cup of water or broth to help loosen them. Cover and simmer for 5 minutes to allow the beans to warm and absorb the flavors from the aromatics.
- Mash the beans: Remove the lid and use a potato masher or the back of a fork to mash the beans directly in the pan. Mash to your desired consistency — smooth or slightly chunky — and add more water or broth if the mixture is too thick or dry.
- Final simmer and seasoning: Keep the heat on low-to-medium and cook for an additional 2–3 minutes, stirring frequently so the beans thicken slightly and the flavors meld. Taste and adjust salt, chili powder, or cumin as needed. Optionally, stir in lime juice, cilantro, or top with shredded cheese, jalapeño, or hot sauce before serving.
- Serve: Serve the refried beans warm as a side dish, as a filling for tacos or burritos, or as a dip with tortilla chips.
Substitutions & Swaps
- Beans: Black beans, kidney beans, or other canned beans can be used instead of pinto beans.
- Oil / Fat: Olive oil can be swapped with vegetable oil, butter, bacon drippings, or lard for a richer flavor.
- Liquid: Use low-sodium vegetable or chicken broth instead of water to enhance flavor.
- Spices: Adjust chili powder or cumin to taste; smoked paprika or chipotle can add extra depth.
- Add-ins: Top with fresh lime juice, chopped cilantro, shredded cheese, or diced jalapeños for added flavor.
Approximate Nutritional Value (per ½ cup serving)
- Calories: 110–130 kcal
- Carbohydrates: 16–22 g
- Protein: 5–7 g
- Fat: 2–4 g (depending on oil/fat used)
- Fiber: 5–7 g
Cost Estimate
- Pinto beans (2 cans, 15 oz each): $2.00 – $2.50
- Onion (½ medium): $0.10 – $0.15
- Garlic (2 cloves): $0.05 – $0.10
- Olive oil / vegetable oil (1 tbsp): $0.10 – $0.15
- Chili powder & cumin (small amounts): $0.05
- Water or broth (½ cup): $0.05 – $0.10
- Optional: lime, cilantro, cheese, or jalapeño: $0.25 – $0.50
Estimated total cost: ~$2.40 – $3.00 (for 4–6 servings)
Cost per serving: ~$0.50 – $0.75
7. Easy Spicy Noodle Spring Rolls
These spring rolls offer a delightful twist on the classic — soft, spicy noodles wrapped in delicate rice paper for a crunchy‑chewy bite. They deliver layers of texture and flavor: the warmth and spice of seasoned noodles, the chewiness of the wrapper, and optional fresh veggies or cheese for contrast. Great as a snack, appetizer, or light meal, they’re easy,
Quick to make and customizable, they’re perfect for casual lunches or sharing with friends.

Ingredients (for ~8–12 rolls, depending on wrapper size and filling amount)
- ~ 200 g spicy noodles (or regular noodles + chili sauce for spice)
- 8–12 rice paper wrappers (spring roll wrappers)
- Optional filling extras (choose some or all): shredded carrots, thinly sliced bell pepper, chopped cabbage or slaw mix, sliced cucumber or zucchini, chopped green onions or scallions
- 1–2 tablespoons neutral oil or sesame oil — for flavor and sauté (optional, depending on noodle type)
- 1–2 tablespoons soy sauce (or similar seasoning)
- 1 tablespoon hot sauce or chili sauce (e.g. sriracha) — adjust to taste
- Optional: sesame seeds, a dash of sesame oil or extra veggies for crunch
Directions
- Cook the noodles: Prepare the noodles as per package instructions (or boil/soak if using plain noodles). Once cooked, drain thoroughly. If they’re not spicy, mix them with hot sauce (sriracha or chili sauce), soy sauce, and a little oil (sesame or neutral) to coat evenly and add flavor. Let them cool slightly so they’re easier to handle.
- Prepare wrappers: Fill a large shallow bowl or dish with warm water. Take one rice paper wrapper and immerse it in the warm water just long enough to soften (usually 10–15 seconds, until pliable but still slightly firm). Lay it flat on a clean surface or damp cloth.
- Assemble the rolls: Place a small portion of the seasoned noodles in the centre of the softened wrapper, leaving a margin on sides. Add optional veggies (carrot, bell pepper, cabbage, cucumber, scallions) over the noodles, plus sesame seeds if using. Be careful not to overfill. Fold the left and right sides over the filling, then roll up tightly from bottom to top — like a burrito — sealing the edge so filling doesn’t spill out.
- Finish (no‑fry or fry/bake):
- For fresh (non-fried) rolls: Serve immediately — they’re soft and chewy, great fresh.
- For crispy rolls: Heat a thin layer of oil in a frying pan over medium heat. Place the rolls seam‑side down and fry, turning occasionally, until all sides are crisp and golden. Alternatively, you can brush with oil and bake in an oven until lightly golden and crunchy.
- Serve: Enjoy warm or at room temperature. They pair well with a dipping sauce: sweet‑spicy chili sauce, soy sauce with a splash of vinegar, or a peanut‑chili dip.
Approximate Nutritional Value
| Nutrient | Amount per Roll |
|---|---|
| Calories | 120–150 kcal |
| Carbohydrates | 22–25 g |
| Protein | 3–4 g |
| Fat | 3–4 g |
| Saturated Fat | 0.5–1 g |
| Fiber | 2–3 g |
| Sodium | 250–350 mg |
Substitutions & Swap Ideas
- Noodles: You can use plain rice noodles, ramen, or any wheat/Asian‑style noodles. If not spicy, just add chili sauce or chili flakes.
- Wrappers: If rice‑paper wrappers are hard to find, try thin wheat wraps or spring‑roll wrappers — though texture will differ.
- Filling add‑ons: Instead of raw veggies, you can use sautéed mushrooms, tofu strips, shredded chicken, or even cheese (for a fusion twist).
- Sauce & seasoning: Swap soy sauce for tamari or coconut aminos, use chili‑garlic sauce instead of sriracha, or add a drizzle of sesame oil for more aroma.
- Cooking method: Skip frying altogether for lighter rolls — just roll and serve fresh. Or bake instead of fry for a less oily but still crisp result.
Cost Estimate
- Spicy noodles (200 g / ~7 oz): $1.50 – $2.00
- Rice paper wrappers (8–12 sheets): $2.50 – $3.50
- Neutral oil or sesame oil (1–2 tbsp): $0.15 – $0.25
- Soy sauce (1–2 tbsp): $0.10 – $0.20
- Hot sauce / chili sauce (1 tbsp): $0.10 – $0.15
- Optional veggies (carrot, bell pepper, cabbage, cucumber, scallions): $1.00 – $1.50
- Optional toppings (sesame seeds, sesame oil drizzle): $0.10 – $0.20
Estimated total cost: ~$5.45 – $8.00 (for 8–12 rolls)
Cost per roll: ~$0.55 – $1.00
Budget- friendly tip: Use only one or two optional veggies and skip sesame seeds to save a bit more.
8. High Protein Egg Roll In a Bowl
This high-protein egg roll in a bowl is a flavorful, deconstructed version of a classic egg roll — without the wrapper. Tender ground meat, crunchy cabbage, and shredded carrots are sautéed with savory garlic, ginger, and soy sauce for a quick, satisfying meal. It’s perfect for a low-carb lunch, dinner, or meal prep, and cooks in under 30 minutes.
Ingredients (4 servings)
- 1 lb (450 g) lean ground chicken, turkey, or pork
- 4 cups shredded cabbage (or coleslaw mix)
- 1 cup shredded carrots
- 2 garlic cloves, minced
- 1 tablespoon fresh ginger, minced
- 2 tablespoons olive oil or sesame oil
- 3 tablespoons soy sauce (or tamari for gluten-free)
- 1 tablespoon rice vinegar or apple cider vinegar
- 1 teaspoon chili sauce or sriracha (optional, for spice)
- 2 green onions, chopped (for garnish)
- Optional: 2 eggs, beaten (for extra protein)
- Optional: sesame seeds for topping
- Salt and pepper, to taste
Directions
- Cook the meat: Heat oil in a large skillet or wok over medium heat. Add the minced garlic and ginger and sauté for 30 seconds until fragrant. Add the ground meat, breaking it apart with a spatula. Cook until fully browned and no longer pink, about 5–7 minutes. Season lightly with salt and pepper.
- Add vegetables: Stir in the shredded cabbage and carrots. Continue to cook, stirring frequently, until the cabbage is wilted but still slightly crisp, about 5–7 minutes.
- Season the dish: Pour in soy sauce, vinegar, and optional chili sauce. Stir to coat the meat and vegetables evenly. If using beaten eggs, push the meat and veggies to one side of the pan, pour in the eggs, and scramble them, then mix into the rest of the dish.
- Finish and serve: Taste and adjust seasonings if needed. Remove from heat, garnish with chopped green onions and sesame seeds. Serve hot as a main dish or over cauliflower rice for a low-carb option.
Nutritional Value (per serving, approx.)
| Nutrient | Amount per Serving |
|---|---|
| Calories | ~250 kcal |
| Protein | ~28 g |
| Carbohydrates | ~10 g |
| Fat | ~12 g |
| Saturated Fat | ~2 g |
| Fiber | ~3 g |
| Sodium | ~500 mg |
Fun Variations
- Spicy Kick: Add extra sriracha, chili flakes, or a drizzle of chili garlic sauce for heat.
- Vegetable Boost: Add mushrooms, bell peppers, snap peas, or zucchini for extra nutrients and crunch.
- Low-Carb / Keto: Serve over cauliflower rice instead of regular rice or noodles.
- Asian Fusion: Add a splash of hoisin sauce or sesame oil for a sweeter, nutty flavor.
- Extra Protein: Mix in scrambled eggs or tofu for a vegetarian-friendly protein boost.
- Meal Prep Friendly: Make a large batch, portion into containers, and reheat for 3–4 days of easy lunches.
Cost Estimate
Estimated total cost: ~$6.95 – $9.00
Cost per serving: ~$1.75 – $2.25
Tip: You can lower costs by using only cabbage and carrots, skipping optional garnishes, or choosing the cheapest lean meat available.
9. Vegan Cauliflower Buffalo Wings
These cauliflower buffalo wings are a spicy, flavourful, and surprisingly satisfying alternative to traditional chicken wings. The cauliflower florets get a light, crispy coating and are baked (or air‑fried) until golden and crunchy, then slathered in tangy buffalo sauce. Even meat eaters often find themselves reaching for more!
Ingredients (4–5 servings)
- 1 small head of cauliflower, cut into bite-size florets
- ½ cup all-purpose flour
- 1 teaspoon garlic powder
- 1½ teaspoons paprika
- ½ teaspoon cumin
- ½ teaspoon sea salt
- ¼ teaspoon black pepper
- ¼ teaspoon cayenne pepper (or adjust for heat preference)
- ¾ cup milk (or plant-based milk for a vegan version)
For the buffalo sauce:
- ½ cup water
- ¼ cup white vinegar
- 1 teaspoon paprika
- 1 teaspoon garlic powder
- ¼ teaspoon cayenne pepper (optional, for extra heat)
- ½ teaspoon salt
Directions
- Preheat & prep: Preheat your oven to 450 °F (≈ 230 °C) and line a baking sheet with parchment paper to prevent sticking and ensure even crisping.
- Cut cauliflower: Chop the cauliflower into small to medium-size florets, roughly wing-size so they cook evenly and resemble bite-sized “wings.”
- Make batter: In a medium bowl, combine the flour, garlic powder, paprika, cumin, salt, black pepper, and cayenne. Gradually whisk in the milk until you get a smooth batter thick enough to coat each floret.
- Coat florets: Toss the cauliflower florets in the batter, ensuring each piece is well coated. Shake off excess batter so pieces don’t stick together.
- Bake first round: Place the coated florets on the prepared baking sheet with some space between them — don’t overcrowd. Bake for about 20 minutes, flipping halfway through, until they begin to crisp and turn golden.
- Make buffalo sauce: While the cauliflower bakes, combine water, vinegar, paprika, garlic powder, cayenne, salt, and tomato paste in a small saucepan. Simmer for 3–5 minutes until the sauce thickens slightly and becomes smooth.
- Sauce and final bake: After the first bake, remove the cauliflower and brush each piece generously with the buffalo sauce. Return to oven and bake another 10–15 minutes, flipping once halfway, until pieces are crisp and slightly deep-colored.
- Serve: Let them cool slightly, then serve warm — ideal with celery sticks and a dip such as ranch, vegan mayo-based dip, or plain yoghurt.
Approximate Nutritional Estimate
| Nutrient | Amount per Serving |
|---|---|
| Calories | ~200–250 kcal |
| Fat | ~7–11 g |
| Carbohydrates | ~20–25 g |
| Protein | ~4–5 g |
| Fiber | ~3–4 g |
| Sodium | variable |
Fun Variations & Swaps
- Gluten-free version: Use brown-rice flour or chickpea flour instead of all-purpose flour.
- Vegan milk: Use soy, oat, or almond milk for a fully vegan option.
- Extra spicy: Increase cayenne pepper or add chili flakes to the batter or sauce.
- Different sauces: Try BBQ glaze, sweet-chili sauce, or chipotle glaze for a different flavor profile.
- Air fryer method: Air-fry the battered florets for an even crispier texture.
- Dipping sauces: Serve with vegan ranch, yogurt-herb dip, spicy mayo, or garlic-avocado dip for added flavor.
Cost Estimate
Estimated total cost: ~$3.05 – $3.25
Cost per serving: ~$0.60 – $0.80
Tip: You can lower costs by using less tomato paste, skipping extra spices, or choosing a smaller cauliflower head.
10. White Chicken Enchiladas
White Chicken Enchiladas are a creamy, comforting twist on classic enchiladas. Tender shredded chicken wrapped in soft tortillas meets a rich, velvety white sauce, melted cheese and mild green chilies, creamy, cheesy, and deeply satisfying. Great for family lunches, potlucks, or a cozy night in.
Ingredients
- ~ 3 cups cooked, shredded chicken (e.g. rotisserie or leftover)
- 8–10 flour tortillas (medium / 8-inch size)
- ~ 2 cups shredded cheese (such as Monterey Jack, cheddar or a blend) — divided
For the creamy white sauce
- 3 tablespoons butter
- 3 tablespoons all‑purpose flour
- 2 cups chicken broth
- 1 cup sour cream (or plain Greek yogurt)
- 1 (4 oz / ~115 g) can mild green chiles, drained (or use diced mild green chilies)
- Salt and pepper, to taste
Directions
- Preheat and prep: Preheat your oven to 350 °F (≈ 175 °C). Lightly grease a 9×13″ baking dish (or similarly sized casserole pan).
- Prepare filling: In a large bowl, combine the shredded chicken with about 1 cup of the shredded cheese. If you like, stir in a little salt and pepper (or mild seasoning) to taste.
- Roll tortillas: Lay out a flour tortilla, spoon a portion of the chicken‑cheese mixture in the centre, then roll tightly. Place each rolled tortilla seam-side down in the prepared baking dish. Repeat until all chicken mixture and tortillas are used (should yield about 8–10 enchiladas depending on tortilla size and filling).
- Make the white sauce: In a saucepan over medium heat, melt the butter. Whisk in the flour and cook for about 1 minute to form a roux. Slowly pour in the chicken broth while whisking constantly, until the mixture is smooth. Continue cooking until the sauce thickens slightly (~4–5 minutes). Remove from heat, then stir in sour cream and the drained green chiles. Taste and adjust salt/pepper if needed.
- Assemble & top: Pour the prepared white sauce evenly over the rolled enchiladas in the baking dish. Sprinkle the remaining shredded cheese on top.
- Bake: Bake in the preheated oven for about 25–30 minutes, or until the sauce is bubbling and cheese is melted and golden. If you want a slightly browned top, you can broil for the last 2–3 minutes (watching carefully to avoid burning).
- Rest & serve: Let the enchiladas rest for 5 minutes after baking — this helps the sauce set slightly for cleaner slices. Garnish with chopped cilantro, green onion or jalapeños if you like. Serve warm.
Approximate Nutritional Value
| Nutrient | Estimate per Serving |
|---|---|
| Calories | ~ 425–475 kcal |
| Protein | ~ 30–35 g |
| Carbohydrates | ~ 25–30 g |
| Fat | ~ 20–25 g |
| Saturated Fat | ~ 10–12 g |
| Fiber | ~ 2–3 g |
| Sodium | moderate to high (depends on broth/cheese/chili saltiness) |
Fun Variations & Swaps
- Spicy twist: Add chopped jalapeños, a pinch of chili powder, or use spicy green chiles instead of mild.
- Vegetarian version: Swap shredded chicken with sautéed mushrooms, beans (black or pinto), or roasted veggies (bell pepper, zucchini, corn) for a meat-free filling.
- Healthier sauce: Use plain Greek yogurt or a light sour cream, and low-sodium broth to reduce fat and sodium.
- Cheese blend: Mix Monterey Jack, cheddar, or pepper jack — or even a Mexican blend — for different flavor profiles.
- Make ahead: Assemble enchiladas and sauce separately; store covered in fridge. When ready to eat — top with sauce & cheese and bake. Great for meal prep or busy weeknights.
Cost Estimate
- Shredded chicken (~3 cups / 450 g, cooked): $4.00 – $5.00 (rotisserie or leftover chicken reduces cost)
- Flour tortillas (8–10 medium): $2.00 – $3.00
- Shredded cheese (~2 cups / 200 g): $2.50 – $3.50
- Butter (3 tbsp): $0.25 – $0.35
- All-purpose flour (3 tbsp): $0.05
- Chicken broth (2 cups): $0.50 – $1.00
- Sour cream (1 cup / 240 ml): $1.00 – $1.50
- Green chiles (4 oz / 115 g can): $0.75 – $1.00
- Optional garnishes (cilantro, jalapeños, extra cheese): $0.25
Estimated total cost: ~$11.30 – $15.00
Cost per serving: ~$1.50 – $2.50
Tip: Using leftover chicken or a smaller amount of cheese can reduce cost further, making this dish very budget-friendly while still creamy and satisfying.
11. Tuna Salad Lettuce Wraps
These wraps are a low-carb, protein-packed lunch that’s both quick to make and budget-friendly. Canned tuna provides affordable, satisfying protein, while crisp lettuce adds a refreshing crunch.
Inspired by classic tuna salad recipe from Kalyn’s Kitchen, this version transforms it into a handheld, easy-to-pack meal that’s perfect for school, work, or on-the-go lunches.
Ingredients
- 1 can tuna, drained
- 2 tablespoons mayonnaise or Greek yogurt
- ¼ red onion, finely chopped
- 1 celery stalk, chopped
- Salt and pepper to taste
- 4–6 large lettuce leaves
Directions
- In a medium bowl, combine the canned tuna with mayonnaise, finely chopped onion, and diced celery. Mix gently until all ingredients are evenly combined, leaving some texture for a satisfying bite.
- Season the mixture with salt and freshly ground black pepper to taste. Taste and adjust the seasoning if needed, keeping it mild for a balanced flavor.
- Spoon a portion of the tuna mixture onto large, crisp lettuce leaves. Fold or roll the leaves around the filling to create handheld wraps.
- Serve immediately, or pack them for a convenient, on-the-go lunch. For extra flavor, you can add sliced avocado, cherry tomatoes, or a sprinkle of fresh herbs inside the wraps.
The Vegan-Friendly Version
For a plant-based twist, swap the tuna for mashed chickpeas, which provide a similar hearty texture and plenty of protein. Mix the chickpeas with vegan mayonnaise, finely chopped celery, and onion, then season with salt, pepper, and a squeeze of lemon juice for brightness.
Spoon the mixture into crisp lettuce leaves and roll them up to create a fresh, handheld wrap. Add extras like diced avocado, shredded carrots, or fresh herbs for flavor and color. These wraps are quick to assemble, nutritious, and perfect for a light, vegan-friendly lunch on the go.
12. Creamy Egg Salad Sandwich
This classic egg salad is an affordable, protein-packed option that’s both simple and satisfying. Hard-boiled eggs provide essential nutrients such as choline, high-quality protein, and healthy fats, making the dish nourishing as well as filling. The creamy texture comes from light mayonnaise or Greek yogurt, which keeps it rich without being overly heavy.
Inspired by traditional egg salad recipes, this version is streamlined for convenience, making it perfect for meal prep, quick lunches, or easy lunchbox options. With just a few pantry staples and fresh eggs, you can whip up a flavorful, versatile salad that works on its own, in sandwiches, or wrapped in lettuce for a low-carb alternative.
Ingredients
- 4 hard-boiled eggs, chopped
- 2 tablespoons mayonnaise or Greek yogurt
- 1 teaspoon mustard
- Salt and pepper to taste
- 2 slices whole-grain bread
- Optional: lettuce or spinach
Directions
- Chop the hard-boiled eggs into small, even pieces and place them in a medium mixing bowl. Add mayonnaise and a small amount of mustard, then gently fold the ingredients together until well combined, keeping some texture in the eggs for a satisfying bite.
- Season the mixture with salt and freshly ground black pepper to taste. Adjust the seasoning gradually, tasting as you go to ensure a balanced flavor.
- Spread a generous layer of the egg salad onto slices of bread. For extra freshness and crunch, add lettuce, spinach, or other leafy greens on top.
- Close the sandwich by placing the second slice of bread on top, pressing lightly to hold everything together. Slice the sandwich in half diagonally or straight down the middle, and serve immediately.
Nutritional Value
| Nutrient | Amount |
|---|---|
| Calories | 320 kcal |
| Protein | 17 g |
| Fat | 21 g |
| Saturated Fat | 4 g |
| Carbohydrates | 19 g |
| Fiber | 3 g |
| Sugars | 3 g |
| Sodium | 400 mg |
Things to Remember:
- Using Greek yogurt instead of mayonnaise will reduce the fat slightly and increase protein.
- Choosing whole-grain bread adds fiber and additional micronutrients.
- Optional add-ins like avocado increase healthy fats, while pickles or paprika add flavor with minimal calories.
13. Rainbow Veggie Stir-Fry With Rice
This vibrant vegetable stir-fry is an affordable, fiber-rich lunch that comes together in minutes. A mix of colorful vegetables sautéed with garlic and soy sauce creates a nutrient-packed, flavorful dish that’s both satisfying and healthy.
I drew inspiration from a rainbow veggie stir-fry recipe on Joyous Health, adapting it to focus on simple, budget-friendly pantry staples and versatile vegetables that are easy to find. This approach keeps the dish flexible, you can use whatever fresh or frozen vegetables you have on hand, making it perfect for quick weeknight meals or meal prep.
Ingredients
- 2 cups cooked rice
- 1 cup mixed vegetables (carrots, broccoli, bell peppers)
- 1 tablespoon olive or sesame oil
- 2 garlic cloves, minced
- 1–2 tablespoons soy sauce
- Salt and pepper to taste
Step-by-Step Directions
- Heat a tablespoon of oil in a large skillet or wok over medium heat. Add minced garlic and sauté for about 1 minute, stirring constantly, until fragrant but not browned.
- Add your choice of vegetables—such as bell peppers, broccoli, carrots, and snap peas—and cook for 5–7 minutes, stirring frequently, until they are tender-crisp. This keeps the vegetables vibrant, slightly crunchy, and full of nutrients.
- Stir in the cooked rice and drizzle with soy sauce, mixing thoroughly. Cook for an additional 2–3 minutes to heat the rice and allow the flavors to meld. Taste and season with salt and freshly ground black pepper as needed. Serve immediately while hot, garnished with optional herbs or seeds.
Flavorful Twists and Ingredient Swaps
- For extra protein, add cubed tofu, cooked chicken, or shrimp to the stir-fry.
- Swap regular soy sauce for tamari or coconut aminos to make the dish gluten-free.
- Add texture and visual appeal by sprinkling toasted sesame seeds, chopped peanuts, or sliced green onions on top.
- Mix in a splash of rice vinegar, a drizzle of sesame oil, or a pinch of chili flakes to adjust the flavor to your preference.
Twist It Up For Your Kids
This veggie stir-fry is perfect for kids because it’s colorful, mild, and easy to eat. Start by heating a little oil in a pan and cooking minced garlic for a minute until it smells delicious. Add soft but slightly crunchy vegetables like bell peppers, carrots, broccoli, or peas, and cook for 5–7 minutes while stirring.
Then, mix in cooked rice and a small splash of soy sauce, cooking a few more minutes until everything is warmed through and well combined. Keep the flavors gentle by skipping spicy seasonings, and consider adding small pieces of cooked chicken, tofu, or shrimp for extra protein. Sprinkle a few sesame seeds or chopped peanuts on top for a fun crunch, and serve in colorful bowls to make mealtime appealing for little ones.
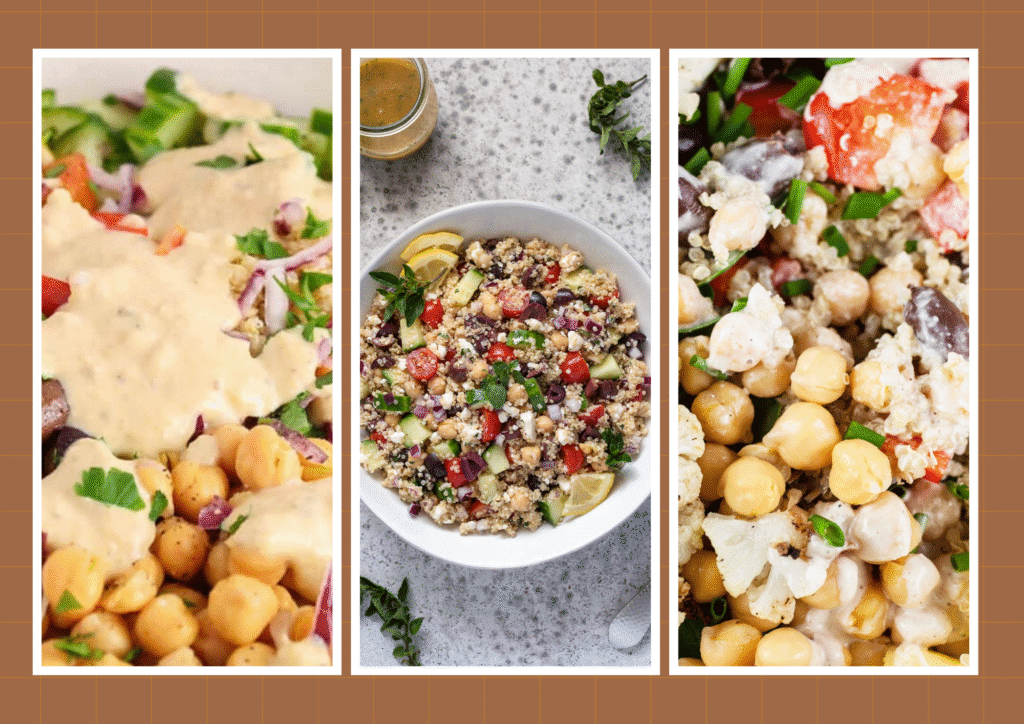
14. Mediterranean Chickpea Quinoa Bowl
This colorful quinoa bowl is a filling, nutrient-packed, and budget-friendly lunch option. Quinoa supplies complete protein, while chickpeas and a variety of vegetables contribute fiber, vitamins, and minerals for a well-rounded meal.
Drawing inspiration from the classic recipe by Plant Based Jess, this version is adapted for convenience, making it easy to prepare ahead of time and ideal for work or school lunches. With a simple dressing and versatile ingredients, it can be customized to suit your taste or whatever produce you have on hand.
Ingredients
- 1 cup cooked quinoa
- ½ cup chickpeas, cooked or canned
- ½ cup cherry tomatoes, halved
- ¼ cucumber, diced
- 2 tablespoons olive oil
- 1 teaspoon lemon juice
- Salt and pepper to taste
How to Make It?
- In a large bowl, combine cooked quinoa, drained chickpeas, halved cherry tomatoes, and diced cucumber. Gently fold the ingredients together so everything is evenly mixed without crushing the vegetables or quinoa.
- Drizzle with extra virgin olive oil and freshly squeezed lemon juice. Toss lightly to coat all the ingredients and allow the flavors to meld.
- Season with salt and freshly ground black pepper to taste. Serve immediately for a fresh, vibrant meal, or refrigerate in an airtight container for an easy, make-ahead lunch. The flavors often improve after sitting for a little while, making it perfect for packing to work or school.
Serve It Up In Style
For extra flavor and creaminess, serve the quinoa chickpea bowl with a dollop of hummus or tzatziki on the side. This adds richness and complements the fresh vegetables perfectly.
This bowl is also ideal for meal prep. Store it in an airtight container in the fridge for 2–3 days, making it a convenient, grab-and-go lunch option. The flavors meld beautifully over time, so it often tastes even better the next day.
15. Tuna Ramen Bowl With Veggies
This tuna ramen bowl is a budget-friendly spin on the classic noodle soup, packed with protein, flavor, and versatility. Canned tuna provides an affordable source of protein, while a mix of vegetables boosts fiber, vitamins, and minerals, making the meal more balanced and satisfying.
Inspired by quick and easy ramen recipe from DishGen , this version is adapted to be more nutritious and lunchbox-friendly, perfect for a filling weekday lunch or a simple dinner. Its flexible ingredients allow you to customize the bowl to your taste, whether you prefer a spicier broth, extra veggies, or a softer noodle texture.
Ingredients
- 1 package instant ramen noodles (discard seasoning packet)
- 1 can tuna, drained
- 1 cup mixed vegetables (carrots, peas, spinach)
- 2 cups water or broth
- 1 teaspoon soy sauce
- Optional: sesame seeds or chili flakes
Step-by-Step Instructions
- Bring water or broth to a boil in a medium saucepan. Add the noodles and cook according to the package instructions until tender but still slightly firm.
- During the last 2–3 minutes of cooking, add your choice of vegetables—such as broccoli florets, bell peppers, or spinach—so they remain vibrant and slightly crisp.
- Drain lightly if needed, then stir in the canned tuna and a splash of soy sauce. Cook for an additional minute until the tuna is heated through and the flavors are well combined.
- Ladle the ramen into bowls and garnish with optional toppings such as sesame seeds, sliced green onions, or a pinch of chili flakes for mild heat and extra flavor. Serve immediately while warm.
Nutritional Table
| Nutrient | Amount |
|---|
| Calories | 350 kcal |
| Protein | 22 g |
| Fat | 12 g |
| Saturated Fat | 2 g |
| Carbohydrates | 40 g |
| Fiber | 5 g |
| Sugars | 4 g |
| Sodium | 700 mg |
- Using water instead of broth will reduce sodium.
- Adding extra vegetables increases fiber, vitamins, and minerals without significantly increasing calories.
- Optional toppings like sesame seeds add a small amount of healthy fats and texture, while chili flakes add flavor with negligible calories.
Smart Tips for Budget-Friendly and Nutritious Lunches
1. Plan Ahead to Save Money and Time
Map out your weekly lunches and make a grocery list. Buying ingredients in bulk or planning meals around seasonal produce reduces waste and cuts costs. Batch cooking or prepping ingredients in advance saves time on busy weekdays.
2. Embrace Plant-Based Proteins
Beans, lentils, chickpeas, tofu, and eggs are inexpensive yet nutrient-rich sources of protein. Using plant-based proteins in recipes like salads, bowls, or wraps keeps lunches affordable and healthy.
3. Mix Fresh, Frozen, and Canned Ingredients
Fresh vegetables and fruits are great, but frozen or canned options can be cheaper and longer-lasting. They still provide essential vitamins, fiber, and minerals without breaking your budget.
4. Keep Flavors Exciting with Herbs and Spices
Herbs, spices, citrus, and small amounts of sauces can elevate simple dishes without adding much cost or calories. A pinch of cumin, paprika, or fresh parsley can turn a basic meal into something flavorful.
5. Cook Once, Eat Multiple Times
Prepare larger portions of soups, salads, grain bowls, or roasted vegetables. These meals can be stored in the fridge or freezer for quick lunches throughout the week, saving both money and prep time.
6. Use Versatile Ingredients
Ingredients like quinoa, brown rice, beans, eggs, and seasonal vegetables can be used in multiple recipes. This reduces waste and keeps lunches interesting with minimal extra cost.
7. Focus on Balanced Meals
Aim to include protein, fiber, and healthy fats in each lunch. This keeps you full longer and supports energy and focus through the day. Pairing grains or vegetables with beans, cheese, or eggs works perfectly.
8. Be Creative with Leftovers
Turn last night’s dinner into a new lunch: roasted veggies can become grain bowls, leftover chicken can be tossed into a salad, and beans can be mashed into spreads or patties.
Eating well on a budget doesn’t have to be boring or complicated. From hearty grain bowls to colorful salads and protein-packed wraps, these 15 recipes show that affordable lunches can be flavorful, nutritious, and satisfying. By planning ahead, using versatile ingredients, and experimenting with swaps and flavors, you can enjoy a variety of meals that keep both your taste buds and your wallet happy.
The best part is that many of these recipes can be prepped in advance, making weekday lunches quick and stress-free. Whether you’re looking to pack a lunchbox, enjoy a meal at your desk, or share something wholesome with family and friends, these ideas fit seamlessly into a frugal, health-conscious lifestyle.
I’ve personally found that keeping a few go-to recipes on hand transforms lunchtime. With these simple strategies and flavorful recipes, eating cheap, healthy, and delicious lunches becomes effortless, and even a little fun.