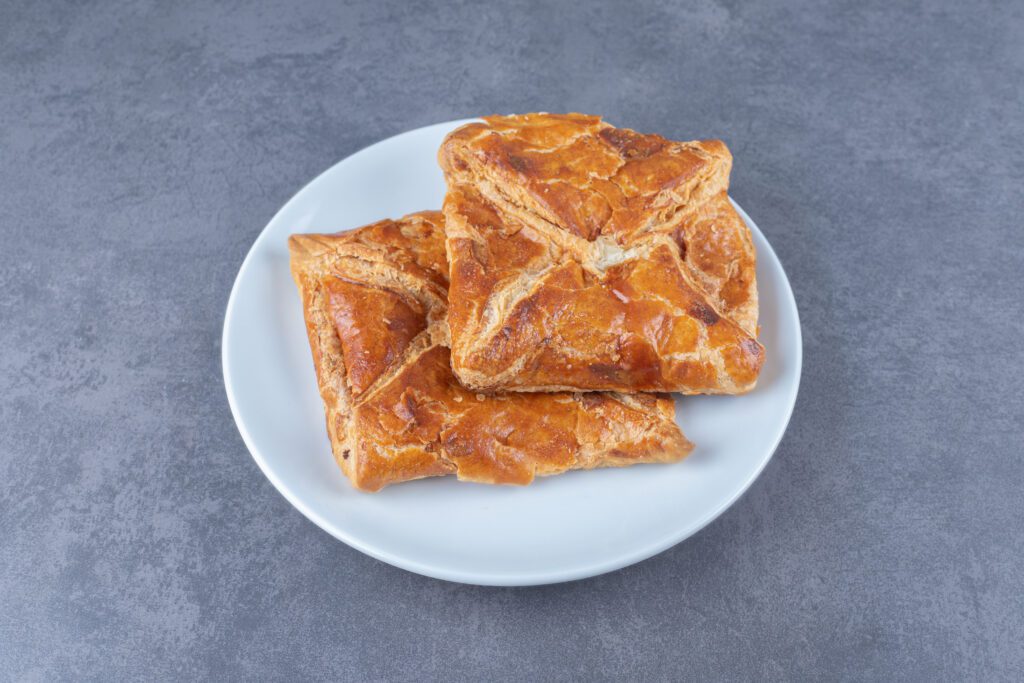
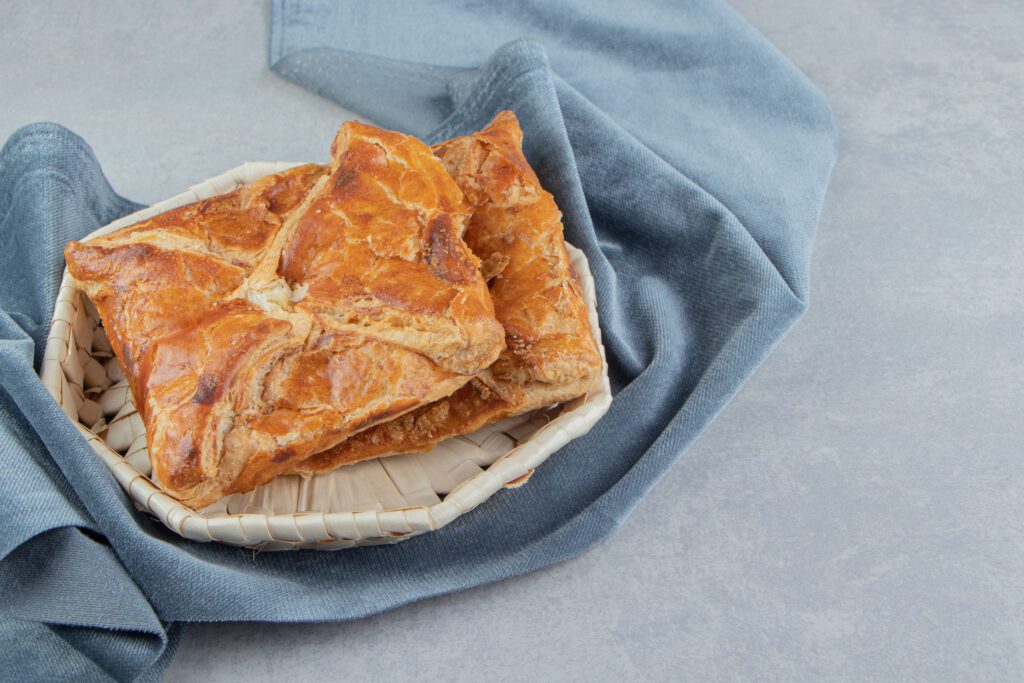
Some recipes feel like a warm hug on a cold day — and this is one of them. Mini Chicken Pot Pies made with golden, flaky puff pastry are that perfect comfort food you can hold in your hand.
They have all the flavors of a classic chicken pot pie — tender chicken, creamy sauce, and a mix of colorful vegetables — but in a smaller, easy-to-serve form.
I’ve always loved how these hand pies can turn an ordinary dinner into something special, whether you’re serving them at a cozy family meal or prepping a quick freezer-friendly lunch.
This version keeps everything you love about a traditional chicken pot pie but makes it lighter, faster, and a little more fun.
Each bite combines buttery puff pastry with a creamy, savory filling — like a comforting casserole wrapped in pastry. If you’ve been searching for mini chicken pot pies that balance flavor, convenience, and charm, this recipe delivers exactly that.
Core Elements of the Recipe
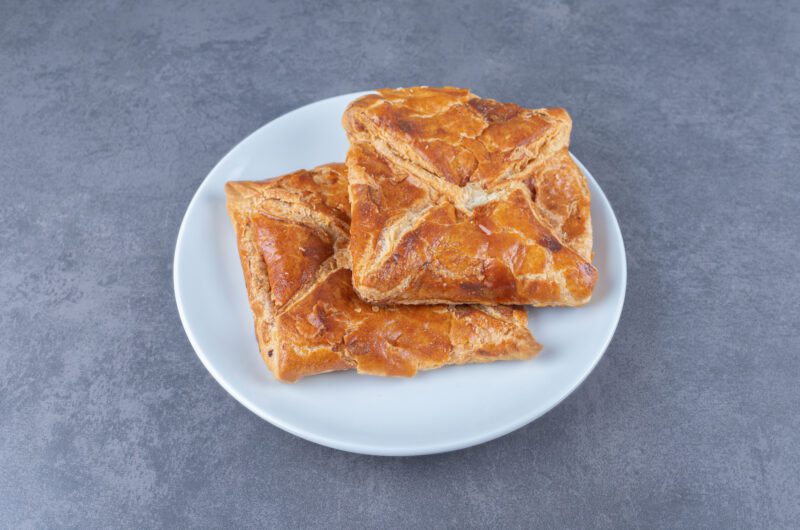
At its heart, this recipe celebrates the balance between flaky pastry and creamy filling. The buttery layers of puff pastry form a crisp shell that contrasts beautifully with the warm, savory mix inside — chunks of chicken, diced carrots, peas, and a thick, herbed sauce.
The filling starts with a simple roux (butter and flour) to create that signature creamy texture. The chicken adds protein and heartiness, while the vegetables bring color and sweetness. When baked, the puff pastry rises into golden, airy layers that shatter gently as you bite in — the essence of cozy cooking made approachable.
These mini chicken pot pies aren’t just adorable; they’re deeply satisfying. The combination of texture, temperature, and aroma is what makes them timeless.
Ingredients
(Serves about 8 individual pies)
Ingredients
- For the Filling
4 tablespoons unsalted butter – Creates the rich base of the sauce and helps the flour cook evenly.
½ cup diced yellow onion – Adds mild sweetness and depth to the filling.
½ cup diced carrots – Brings color and gentle sweetness; also adds structure to the mix.
2 cloves garlic, minced – A small touch that adds warmth and aroma.
⅓ cup all-purpose flour – Thickens the sauce, giving the filling that luxurious, spoonable consistency.
1 ½ cups chicken stock – Provides savory depth; use low-sodium for better control of salt.
½ cup whole milk – Adds creaminess and rounds out the sauce texture.
½ teaspoon salt – Enhances every flavor without overpowering.
¼ teaspoon freshly ground black pepper – Lends mild spice and aroma.
1 teaspoon fresh parsley leaves – Offers a fresh, woodsy flavor that complements poultry perfectly.
2 cups cooked, shredded chicken – The star protein; tender and hearty.
½ cup frozen peas – Adds sweetness and a pop of green color for visual appeal.
- For the Assembly
2 sheets puff pastry, thawed – The flaky shell that makes these pies so irresistible.
1 large egg (for egg wash) – Gives the pastry its glossy golden finish.
1 tablespoon water – Thins the egg wash for easy brushing.
Equipment Needed
You don’t need anything fancy here — just a few kitchen staples:
- Sheet pan: For baking the hand pies evenly.
- Rolling pin: To flatten and shape the puff pastry.
- Pastry brush: For brushing on that shiny egg wash.
- Medium saucepan: To cook the filling.
- Sharp knife or pastry cutter: For cutting perfect pastry circles or squares.
- Fork: To crimp the edges and seal the pies.
Directions
- Start by melting butter in a medium saucepan over medium heat. Butter not only adds flavor but also forms the foundation of your roux — a thickening base for the sauce.
Add the onions, carrots, and celery, and cook them slowly for about five minutes. This step brings out their natural sweetness and ensures they soften enough to meld into the creamy filling. - Add minced garlic and stir until fragrant — about 30 seconds. Then, sprinkle the flour over the vegetables.
Cook the flour for a minute or two; this eliminates the raw flour taste and ensures a smooth sauce.
Gradually pour in chicken stock while whisking constantly, followed by the milk. The key is to add liquid slowly so you don’t end up with lumps. - Once the sauce thickens, season with salt, pepper, and thyme. Stir in the shredded chicken and peas, then remo
ve from heat. Let the filling cool before assembling the pies — this prevents the pastry from becoming soggy. - Roll out the puff pastry on a lightly floured surface. Cut into desired shapes — circles for classic pies or rectangles for easy folding.
Spoon filling into the center of half the pastry pieces, then top with the remaining pastry.
Press the edges with a fork to seal, brush with egg wash, and bake until golden brown.
Troubleshooting Q&A
Q: My puff pastry didn’t rise. Why?
A: Puff pastry needs to stay cold before baking. If it warms up too much, the butter layers melt and flatten instead of puffing up. Chill the pies for 10–15 minutes before baking.
Q: The filling leaked out during baking — what happened?
A: You may have overfilled the pastry or not sealed the edges tightly. Use a fork to crimp firmly and leave a small border around the edges.
Q: My filling is too runny. How can I fix it?
A: Add a bit more flour next time or cook the roux longer before adding liquid. Cooling the filling before assembly also helps it thicken naturally.
Q: The pastry bottom was soggy. How do I make it crispier?
A: Bake on the lower rack of your oven and use a preheated baking sheet. This helps the bottom layer cook faster.
Q: Can I make these ahead?
A: Yes! You can freeze unbaked pies on a tray, then transfer to a freezer bag. Bake from frozen at 400°F for 30–35 minutes.
Q: How can I make them more flavorful?
A: Add a pinch of nutmeg to the sauce or brush the tops with garlic butter after baking.
Dietary Needs and Swaps
- Dairy-Free: Use plant-based butter and milk; the filling still turns out creamy.
- Gluten-Free: Substitute gluten-free puff pastry and use cornstarch instead of flour to thicken the sauce.
- Low-Sodium: Use unsalted butter, low-sodium broth, and skip extra salt.
- Vegetarian: Swap chicken for mushrooms and lentils — you’ll still get that hearty texture.
Nutritional Snapshot
Here’s an approximate nutritional breakdown per hand pie (based on 8 servings):
| Nutrient | Amount | Benefit |
|---|---|---|
| Calories | 350 | Satisfying yet moderate for a main dish. |
| Protein | 18 g | Strong dose from chicken and milk. |
| Fat | 21 g | Mostly from puff pastry and butter. |
| Carbs | 25 g | Provides steady energy without heaviness. |
| Fiber | 2 g | Comes from vegetables and whole ingredients. |
| Sodium | 380 mg | Can be adjusted based on broth used. |
| Calcium | 8% DV | From milk and butter. |
| Iron | 10% DV | Chicken and vegetables contribute a steady boost. |
Nutritional Insight
This dish combines balanced macronutrients — protein, carbs, and healthy fats — with vitamins from vegetables. Despite its comfort-food label, each portion is quite balanced, especially if paired with a light side salad or soup.
Budget-Friendly Adjustments
- Replace chicken breasts with rotisserie chicken to save prep time and money.
- Use frozen mixed veggies instead of fresh for a quicker, cheaper version.
- Make a double batch and freeze half — buying puff pastry in bulk is cost-effective.
Creative Leftover Uses
- Breakfast Treat: Reheat and top with a fried egg for a protein-packed breakfast.
- Soup Pairing: Crumble leftover pies into a bowl of soup for a hearty twist.
- Lunchbox Option: These taste just as good at room temperature, perfect for meal prep.
How to Keep It Fresh Longer
- Store cooled pies in the refrigerator for up to 4 days in an airtight container.
- Reheat in the oven at 350°F for 10–12 minutes to revive crispness.
- Freeze unbaked or baked pies for up to 2 months; thaw in the fridge before reheating.
A Bit of History: The Story of Pot Pies
Pot pies trace their roots back to ancient Greece and Rome, where savory fillings were enclosed in pastry crusts. Over centuries, this humble idea evolved into the British meat pies that inspired American settlers to create their own — adding poultry, vegetables, and creamy sauces.
By the 19th century, chicken pot pie had become a symbol of comfort and resourcefulness, using leftover roasted chicken and pantry staples.
The idea of turning them into hand pies came later, blending convenience with nostalgia. Today, mini chicken pot pies reflect that perfect blend of tradition and modern practicality — handheld comfort food with a homemade touch.
Serving Ideas
Serve your mini chicken pot pies with a crisp green salad or a warm bowl of tomato soup.
They also pair beautifully with roasted vegetables or mashed potatoes if you’re serving them for dinner. For a cozy brunch twist, offer them alongside a soft herb omelet or fruit salad.
Chicken Pot Pie Hand Pies With Puff Pastry
Course: Appetizers, Snacks8
servings25
minutes25
minutes50
minutesIngredients
- For the Filling
4 tablespoons unsalted butter
½ cup diced yellow onion
½ cup diced carrots
2 cloves garlic, minced
⅓ cup all-purpose flour
1 ½ cups chicken stock
½ cup whole milk
½ teaspoon salt
¼ teaspoon freshly ground black pepper
1 teaspoon fresh parsley leaves
2 cups cooked, shredded chicken
½ cup frozen peas
- For the Assembly
2 sheets puff pastry, thawed
1 large egg (for egg wash)
1 tablespoon water
Directions
- Preheat your oven to 400°F (200°C) and line a baking tray with parchment paper. This helps the pies bake evenly and keeps the bottoms crisp.
- In a large skillet, melt butter over medium heat. Add onion, garlic, carrot, and celery, then sauté until soft and fragrant, about 5–6 minutes.
- Sprinkle in the flour and stir well to coat the vegetables. Cook for another minute to remove the raw flour taste.
- Gradually pour in the chicken broth and cream, stirring constantly until the mixture thickens into a smooth, creamy filling.
- Add the cooked shredded chicken, peas, thyme, salt, and pepper. Mix until everything is coated, then set aside to cool slightly.
- Cut the puff pastry into even squares or circles. Spoon the filling onto half the pieces, brush edges with egg wash, and top with the remaining pastry.
- Seal the edges with a fork, brush tops with egg wash, and make a small slit for steam to escape. Bake for 20–25 minutes until golden and flaky.
- Let them rest for 5 minutes before serving. These mini chicken pot pies are best enjoyed warm and crisp from the oven.