Nothing beats easy, sugar-free snacks and treats you can grab on the go — especially when they’re simple to make, naturally sweetened, and perfectly portioned for busy days! These healthy, no sugar snacks are ideal for travel, work, school lunches, road trips, or post-workout, gym, or exercise refueling.
If you’re craving a no carb snacks, a protein-packed treat, or a satisfying keto-friendly snack, these recipes will keep you full and energized without the sugar crash.
From nut and seed mixes to cheese bites, sugar-free energy balls, and low-carb dips, there’s something here for everyone — even picky eaters!
These are the ultimate sugar-free snack ideas to enjoy any time — budget-friendly, meal prep approved, and totally guilt-free. Perfect for anyone following a low-sugar, keto, or diabetic-friendly lifestyle, or simply wanting to snack smarter without sacrificing flavor.
Why Choose Sugar Free No Carb Snacks?
Sugar-free snacking has become increasingly important as awareness grows around the negative health impacts of excess sugar consumption.
Regular sugar consumption contributes to weight gain, energy crashes, increased disease risk, and dental problems. Sugar-free alternatives provide sustained energy without the spike-and-crash cycle that traditional sugary snacks create. They’re ideal for people managing their weight, controlling blood sugar levels, and those following ketogenic or low-carb diets.
The portability factor makes these snacks invaluable for busy professionals, students, parents, and travelers. Preparing and packing sugar-free snacks ensures you always have a healthy option available, reducing the temptation to reach for convenience store candy or vending machine treats.
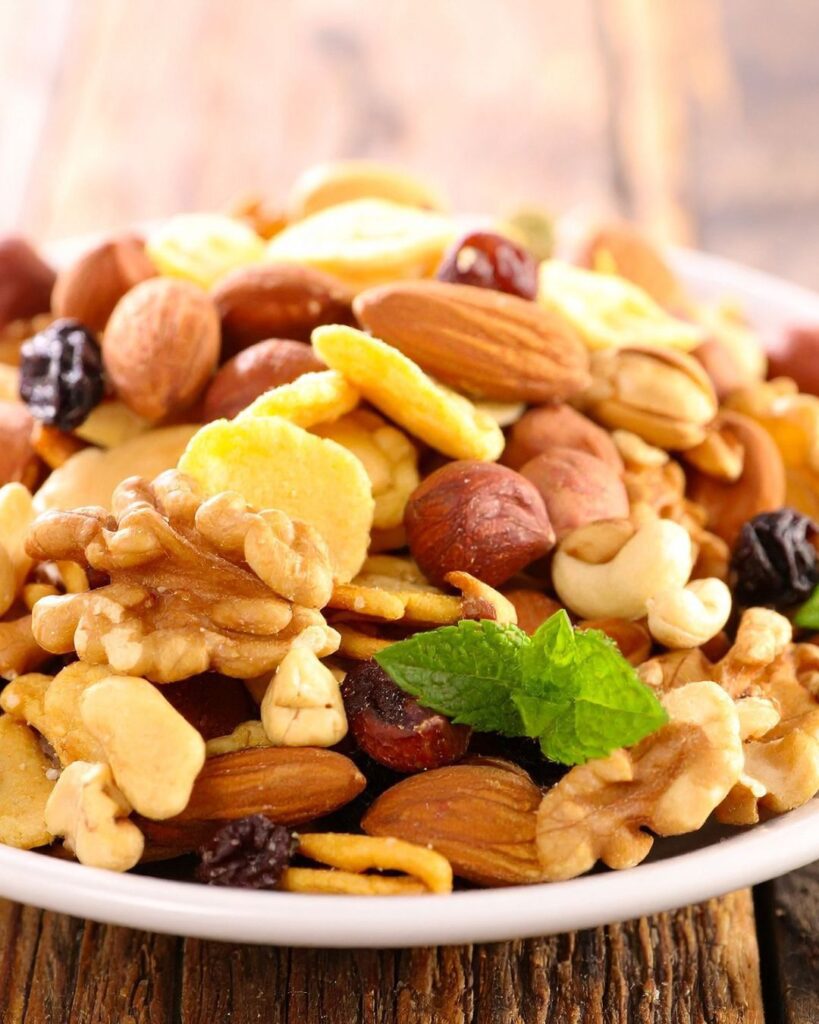
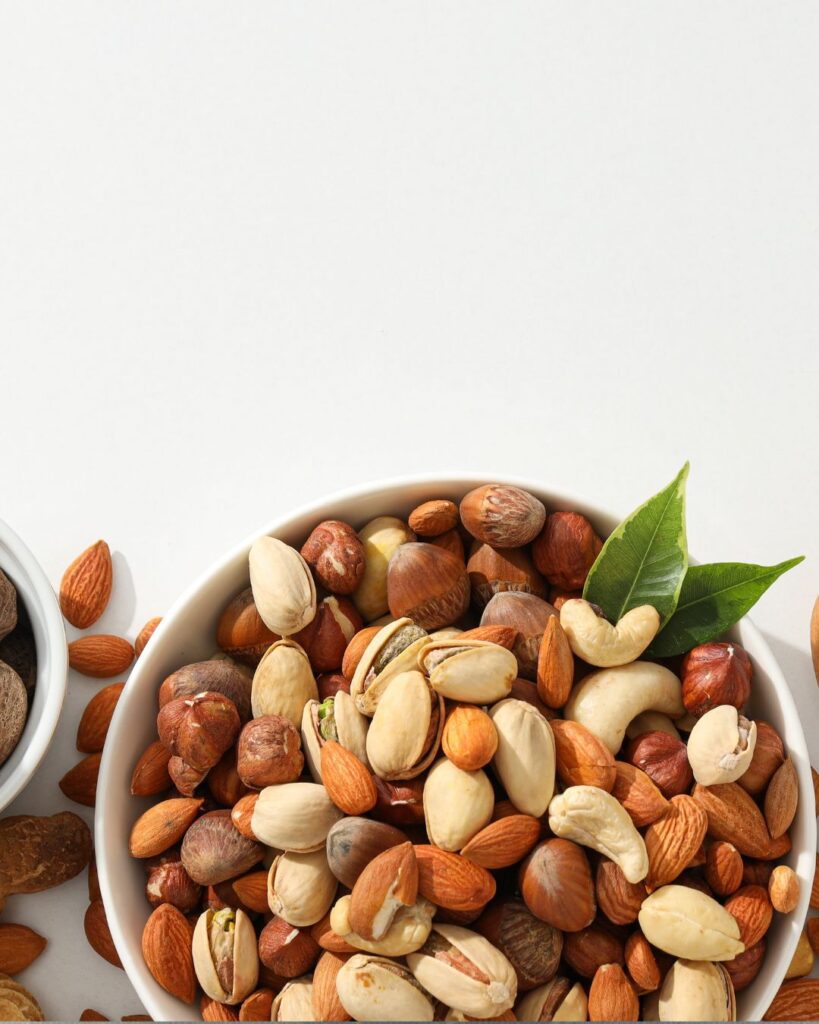
1. Nuts and Seeds Mix
Almonds, walnuts, cashews, and pumpkin seeds create the ultimate portable protein-and-healthy-fat combination. Pack a small handful in containers or bags for immediate grab-and-go convenience.
This snack stabilizes blood sugar through protein and fiber content while providing sustained energy for hours.
The natural oils and minerals support brain function and heart health.
Create your own mix to control salt content or add variety with macadamia nuts, pecans, or sunflower seeds.
Here are some healthy, sugar-free nuts and seeds mix recipes that are perfect for snacking — full of crunch, protein, and healthy fats.
1. Savory Spiced Nuts & Seeds Mix
Ingredients:
- ½ cup almonds
- ½ cup cashews
- ¼ cup pumpkin seeds
- ¼ cup sunflower seeds
- 1 tbsp olive oil
- ½ tsp smoked paprika
- ¼ tsp garlic powder
- ¼ tsp sea salt
Instructions:
- Toss nuts and seeds with olive oil and spices.
- Spread on a baking sheet and roast at 325°F (160°C) for 10–12 minutes.
- Let cool and store in an airtight jar.
Flavor tip: Add a dash of chili powder for a spicy kick!
2. Zesty Lemon Herb Trail Mix
Ingredients:
- ½ cup walnuts
- ½ cup pecans
- ¼ cup chia seeds
- ¼ cup sesame seeds
- 1 tsp lemon zest
- ½ tsp thyme or rosemary
- 1 tbsp coconut oil
- Pinch of salt
Instructions:
- Combine all ingredients and toss with melted coconut oil.
- Bake at 300°F (150°C) for 15 minutes, stirring halfway.
- Cool completely before storing.
Perfect for: An afternoon pick-me-up that’s savory, tangy, and refreshing.
3. Coconut Cinnamon Crunch Mix
Ingredients:
- ½ cup hazelnuts
- ½ cup almonds
- ¼ cup flaxseeds
- ¼ cup unsweetened coconut flakes
- ½ tsp cinnamon
- 1 tbsp coconut oil
Instructions:
- Mix everything and bake at 325°F (160°C) for 10 minutes.
- Cool and store in a sealed container.
Tastes like: Cinnamon granola — but completely sugar-free!
4. Everything Bagel Nuts & Seeds Mix
Ingredients:
- ½ cup cashews
- ½ cup almonds
- ¼ cup pumpkin seeds
- ¼ cup sunflower seeds
- 1 tbsp everything bagel seasoning
- 1 tbsp olive oil
Instructions:
- Toss nuts and seeds with oil and seasoning.
- Bake at 325°F for 12 minutes until golden.
Snack idea: Sprinkle on Greek yogurt or cottage cheese for a savory crunch.
5. Chili Lime Nut & Seed Snack
Ingredients:
- ½ cup peanuts
- ½ cup cashews
- ¼ cup sesame seeds
- 1 tsp chili powder
- Zest of 1 lime
- 1 tbsp avocado oil
- Pinch of salt
Instructions:
- Mix everything in a bowl.
- Roast at 300°F (150°C) for 15 minutes.
Tastes like: A bold, tangy bar snack — with zero sugar!
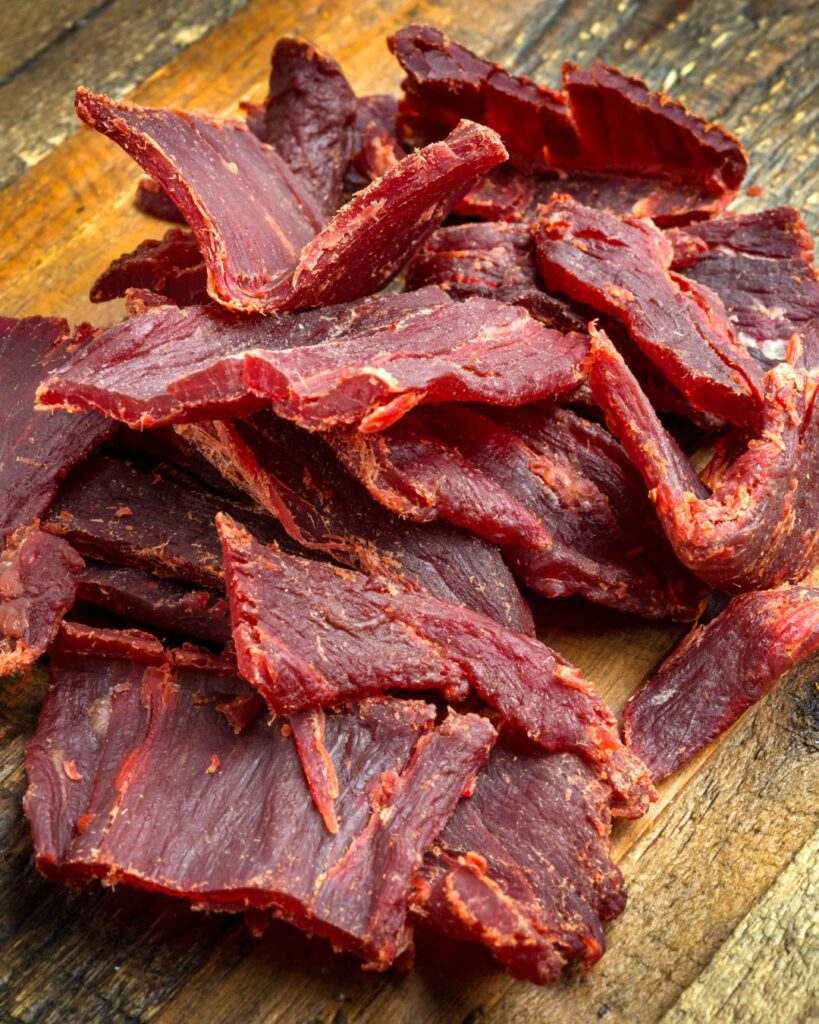
2. Beef Jerky
Beef jerky represents an excellent high-protein, zero-sugar snack perfect for active individuals and those with demanding schedules.
Choose brands with minimal added sugars and no artificial ingredients. Jerky satisfies the need for chewing and provides long-lasting satiety, making it ideal during afternoon energy slumps.
Homemade versions allow complete control over ingredients. Turkey and salmon jerky offer flavorful alternatives to traditional beef varieties.
Here are 3 unique and flavorful beef jerky recipes — each with its own twist for every kind of snacker 👇
1. Korean Gochujang Beef Jerky
Flavor: Sweet, spicy, umami-rich
Ingredients:
- 1 lb lean beef (flank or top round, thinly sliced)
- 2 tbsp gochujang (Korean chili paste)
- 2 tbsp soy sauce
- 1 tbsp sesame oil
- 1 tbsp rice vinegar
- 1 tbsp honey or sugar-free sweetener
- 1 tsp garlic powder
- 1 tsp ginger powder
- 1 tbsp sesame seeds
Instructions:
- Mix all marinade ingredients in a bowl.
- Add beef slices and marinate overnight in the fridge.
- Lay strips on a wire rack and dehydrate at 165°F (74°C) for 4–6 hours, until dry but still slightly bendy.
Pro tip: Sprinkle extra sesame seeds before drying for a crunchy texture.
2. Chipotle Lime Beef Jerky
Flavor: Smoky, tangy, and zesty
Ingredients:
- 1 lb beef sirloin, thinly sliced
- 2 tbsp soy sauce
- 1 tbsp Worcestershire sauce
- 2 tbsp lime juice
- 1 tbsp chipotle in adobo sauce
- 1 tsp smoked paprika
- ½ tsp black pepper
- 1 tsp salt
Instructions:
- Whisk marinade ingredients together.
- Add beef and refrigerate for 6–12 hours.
- Dehydrate at 165°F (74°C) for 5 hours or until desired dryness.
Best for: Road trips or hiking — flavorful and high in protein.
3. Maple Mustard Beef Jerky (Sweet & Savory)
Flavor: A gourmet twist with a sweet kick
Ingredients:
- 1 lb lean beef, thinly sliced
- 2 tbsp Dijon mustard
- 1½ tbsp pure maple syrup (or sugar-free syrup)
- 2 tbsp soy sauce
- ½ tsp black pepper
- 1 tsp garlic powder
Instructions:
- Combine all ingredients and marinate beef overnight.
- Place on parchment or wire rack and dry at 160–170°F (70–75°C) for 4–5 hours.
Tastes like: A mix between classic jerky and honey mustard — tender, tangy, and slightly sweet.
3. String Cheese or Cheese Cubes
Portable cheese provides quick protein and satisfying calcium without any added sugar. String cheese’s convenient format requires no preparation, while cheese cubes work beautifully in small containers.
The combination of protein and fat keeps you feeling full, making cheese an excellent choice for preventing overeating later.
Experiment with different varieties like sharp cheddar, mozzarella, or gouda for flavor variety.
1- Crispy Herb-Coated Cheese Bites (Air Fryer or Fried)
Perfect for: A quick high-protein, low-carb snack
Texture: Crispy outside, gooey and melty inside
Diet-friendly: Keto, gluten-free, and sugar-free

Ingredients:
- 8 oz mozzarella or sharp cheddar cheese, cut into 1-inch cubes
- ½ cup finely crushed pork rinds (or almond flour for vegetarian version)
- 1 tbsp dried Italian herbs
- 1 tsp garlic powder
- ½ tsp paprika
- ¼ tsp sea salt
- 1 egg, lightly beaten
- Optional: Coconut oil for deep frying
Instructions:
- Freeze the cheese:
Cut cheese into 1-inch cubes and freeze for at least 2 hours to help them hold shape while cooking. - Prepare coating:
In a shallow bowl, mix crushed pork rinds (or almond flour), Italian herbs, garlic powder, paprika, and sea salt. - Coat the cubes:
Working quickly, dip each frozen cheese cube into the beaten egg, then roll it in the herb mixture until evenly coated. - Chill again:
Arrange coated cheese cubes on a parchment-lined baking sheet and freeze for another 30 minutes. - Cook:
- Air Fryer Method: Air fry at 380°F (190°C) for 6–8 minutes, until golden and crisp on the outside.
- Deep Fry Method: Heat coconut oil in a pan and fry for 1–2 minutes, just until golden.
- Serve:
Enjoy immediately for the best gooey, melty texture! - Storage:
Store cooled bites in an airtight container in the refrigerator for up to 5 days. Reheat in an air fryer for 2–3 minutes before serving.
2. Marinated Cheese Cubes with Herbs & Olive Oil
Flavor: Savory, herby, and Mediterranean-inspired
Ingredients:
- 2 cups cheese cubes (mozzarella, cheddar, or feta)
- ½ cup extra virgin olive oil
- 1 tsp dried oregano
- 1 tsp crushed red pepper flakes
- 2 garlic cloves, sliced
- Fresh rosemary or thyme sprigs
- Optional: Olives or sun-dried tomatoes
Instructions:
- In a clean jar, layer cheese cubes, herbs, and garlic.
- Pour olive oil over until fully covered.
- Refrigerate for at least 24 hours to infuse flavor.
Snack Tip: Pair with whole grain crackers, add to lunch boxes, or toss into salads for instant flavor and protein.
4. Hard-Boiled Eggs
Hard-boiled eggs stand as the quintessential portable protein source. Prepare a batch on Sunday for week-long convenience.
Each egg delivers complete protein, choline for brain health, and lutein for eye support—all with zero sugar. The compact size and natural packaging make eggs perfect for backpacks or gym bags—season with salt, pepper, or everything bagel seasoning for added flavor.
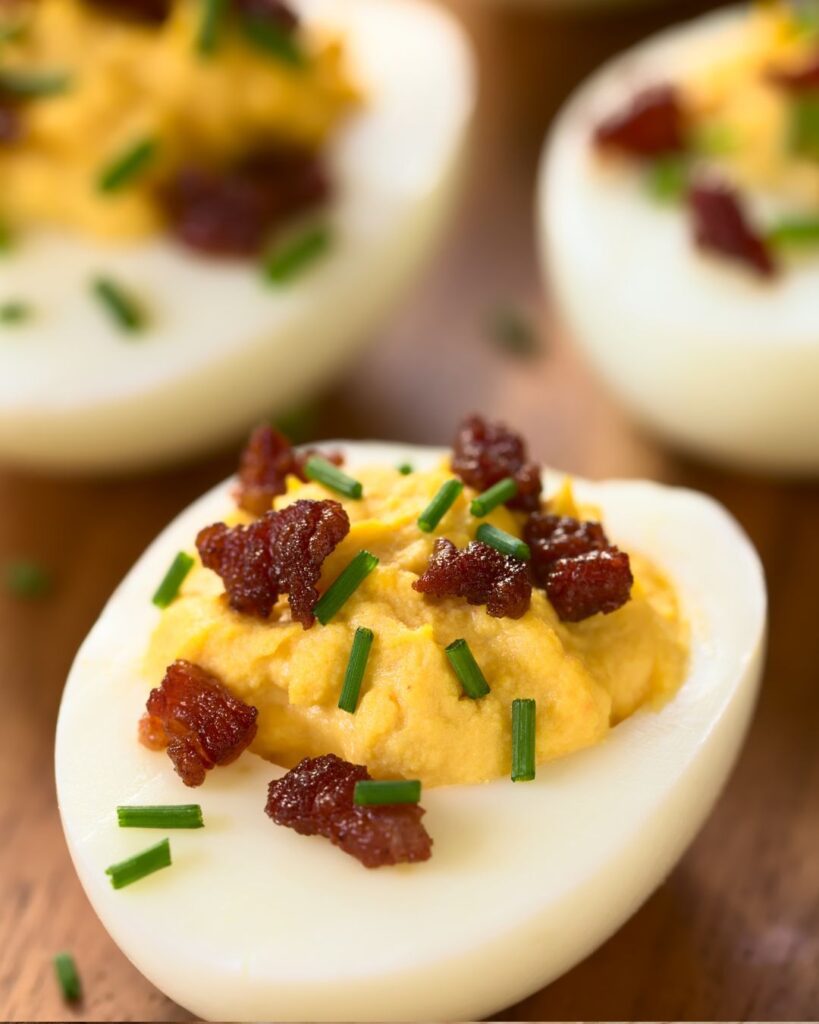
Everything Bagel Seasoning Deviled Eggs
Ingredients:
- 12 large eggs
- ¼ cup Greek yogurt or mayonnaise
- 1 tbsp Dijon mustard
- 1 tbsp apple cider vinegar
- 1 tsp paprika
- Salt, to taste
- Everything bagel seasoning, for topping (mix of sesame seeds, poppy seeds, dried garlic, dried onion, and sea salt)
Instructions:
- Boil and peel eggs:
Hard-boil 12 eggs. Once cooled, peel them carefully. - Prepare the yolk mixture:
Slice each egg in half lengthwise. Remove the yolks and place them in a bowl. Mash 9 yolks (reserve 3 for another use). - Mix the filling:
Add Greek yogurt (or mayo), Dijon mustard, apple cider vinegar, paprika, and salt to the mashed yolks. Stir until smooth and creamy. - Fill the egg whites:
Transfer the mixture to a piping bag (or use a spoon) and fill each egg white cavity with the yolk mixture. - Garnish:
Sprinkle generously with everything bagel seasoning on top. - Chill and serve:
Refrigerate until ready to serve. These eggs stay fresh for up to 5 days and can be eaten cold or at room temperature.
5. Celery with Almond Butter
The combination of crisp celery and creamy almond butter creates a satisfying, nutrient-dense snack. Pack individually portioned almond butter cups and celery sticks in containers for easy transport.
The fiber in celery and protein in almond butter work together to provide stable blood sugar and lasting fullness. This snack particularly appeals to those craving something crunchy without sacrificing nutrition.
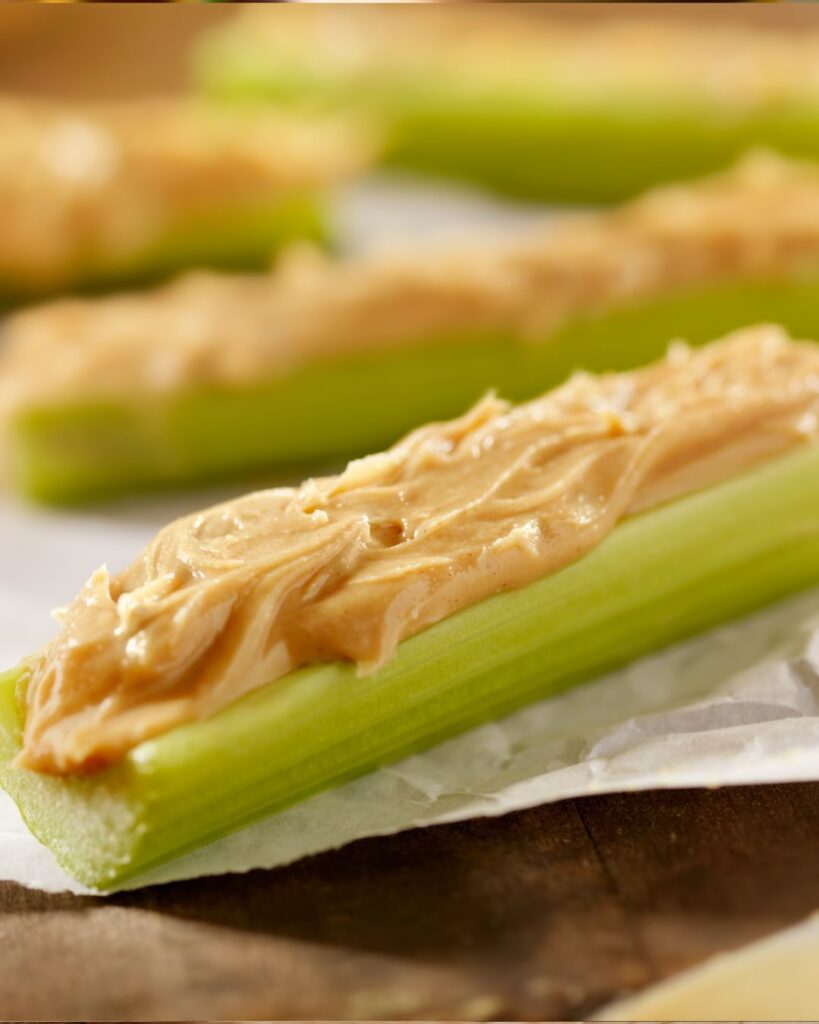
1- Cinnamon Spiced Almond Butter Dip Recipe
Ingredients:
- 1 cup raw almonds
- 1 tablespoon coconut oil
- 1 teaspoon vanilla extract
- ½ teaspoon ground cinnamon
- ¼ teaspoon sea salt
- 1 teaspoon erythritol or stevia (optional, for sweetness)
- Fresh celery sticks, cut into 3-inch pieces (for dipping)
Instructions:
- Blend the almonds:
Add 1 cup of raw almonds to a food processor. Blend for about 8–10 minutes, stopping occasionally to scrape down the sides. The almonds will gradually turn from crumbs to a smooth, creamy butter as their natural oils release. - Add flavor:
Once smooth, add coconut oil, vanilla extract, cinnamon, sea salt, and sweetener (if using). Continue blending until fully incorporated and creamy. - Store:
Transfer the almond butter to an airtight container and store in the refrigerator for up to 2 weeks. - Serve:
Portion into small containers and serve with fresh celery sticks for dipping.
6. Roasted Chickpeas
Crispy roasted chickpeas make an addictive alternative to traditional salty snacks without any added sugar. Prepare batches at home by roasting canned chickpeas with olive oil and your favorite seasonings like paprika, garlic powder, or curry spices.
The high fiber and protein content makes them surprisingly filling despite their light texture. Store in airtight containers for a week of convenient snacking.
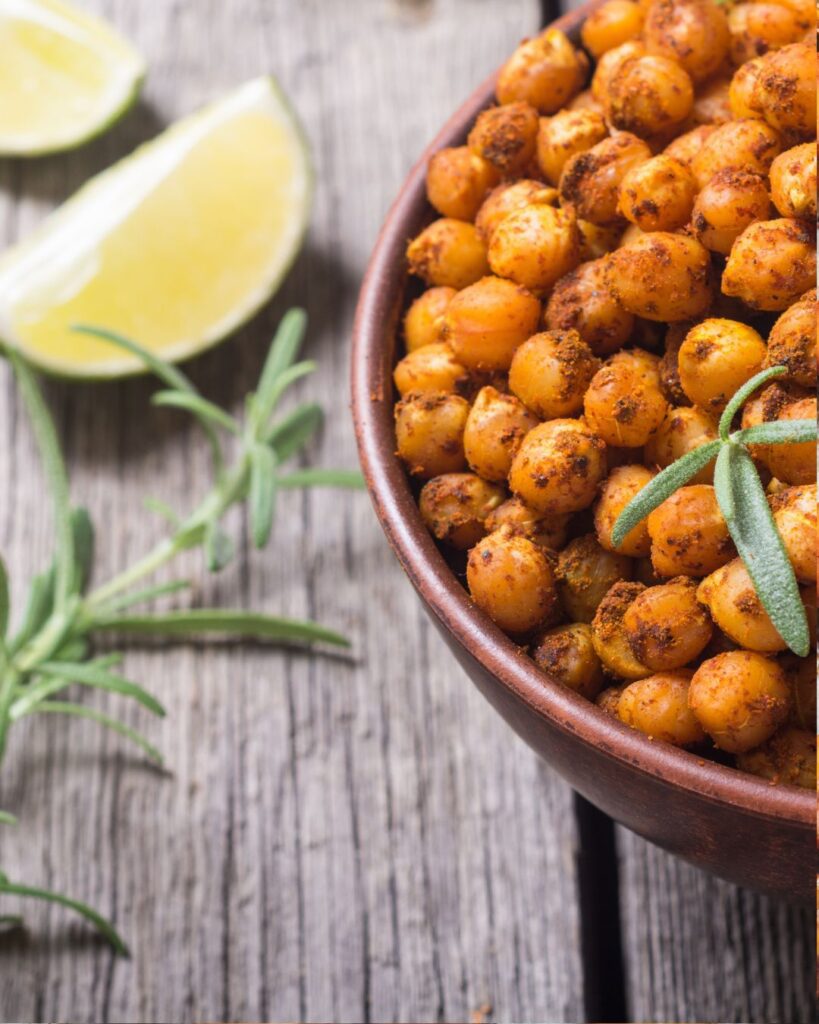
Sriracha Lime Roasted Chickpeas Recipe
Ingredients:
- Two 15-ounce cans chickpeas
- 2 tablespoons olive oil
- 1-2 tablespoons sriracha sauce
- Zest of 2 limes
- Juice of 1 lime
- 1 teaspoon garlic powder
- 1 teaspoon paprika
- 1 teaspoon sea salt
Instructions:
- Drain chickpeas from cans and rinse under cold water
- Spread chickpeas on paper towels and pat completely dry
- In a bowl, combine olive oil, sriracha sauce, lime zest, lime juice, garlic powder, paprika, and sea salt
- Toss dried chickpeas with sriracha mixture until evenly coated
- Spread in a single layer on a parchment-lined baking sheet
- Roast at 400°F for 35-45 minutes total
- Shake the pan every 10 minutes for even roasting
- Remove when completely crispy and golden
- Cool on the baking sheet until fully crispy
- Finish with extra lime zest and a pinch of sea salt
- Store in airtight containers for up to one week
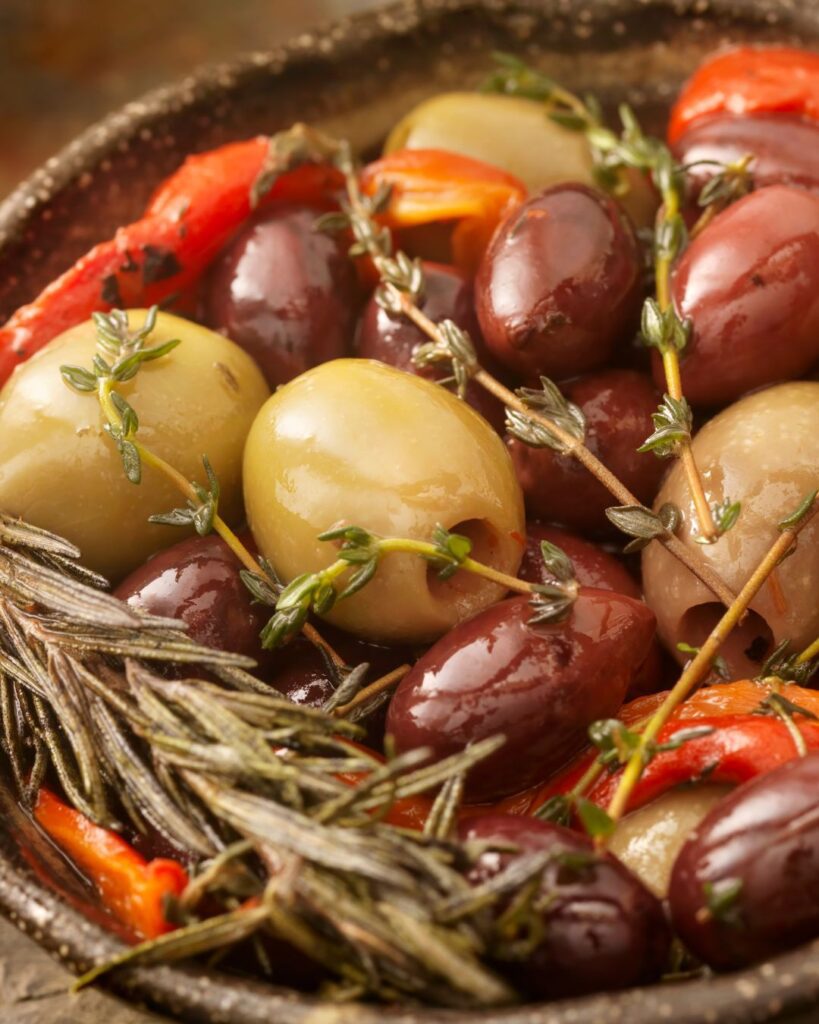
7. Olives
These small powerhouses deliver healthy fats, antioxidants, and a satisfying salty flavor entirely naturally. Pre-pitted varieties eliminate preparation time and mess.
The healthy monounsaturated fats support heart health and promote satiety. A small container of olives provides complete nutrition without any processing or added sugar. Greek, Kalamata, or green varieties offer flavor diversity.
Rosemary Garlic Marinated Olives
Ingredients:
- 2 cups pitted olives
- 4 cloves garlic, smashed
- 4 sprigs fresh rosemary
- ½ teaspoon red pepper flakes
- 1 bay leaf
- Extra virgin olive oil (enough to cover olives)
Instructions:
- Drain original brine from canned olives
- Find a clean glass jar with a lid
- Add olives to the jar
- Layer in smashed garlic cloves
- Add fresh rosemary sprigs
- Sprinkle red pepper flakes
- Add bay leaf
- Pour extra virgin olive oil over everything until olives are completely covered
- Seal jar tightly
- Refrigerate for at least 3 days before eating
- Allow flavors to meld and develop
- Store in refrigerator for up to 3 weeks
- Reuse the infused oil as salad dressing or bread dip
8. Sugar-Free Nuts Butter Packets
Single-serving nut butter packets offer maximum convenience and portion control. These packets provide quick energy and protein without refrigeration needs.
Choose varieties made with minimal ingredients—just nuts and perhaps salt. Almond butter, peanut butter, and cashew butter varieties satisfy cravings while delivering nutritional value. Consume straight from the packet or pair with vegetables.
Chocolate Hazelnut Nuts Butter Packets
Ingredients:
- 2 cups roasted, unsalted hazelnuts
- 2 tablespoons coconut oil
- 2 teaspoons vanilla extract
- 1 teaspoon erythritol (or ½ teaspoon stevia)
- ¼ teaspoon sea salt
- 2 tablespoons unsweetened cocoa powder
Instructions:
- Add roasted hazelnuts to a food processor
- Blend for 8-10 minutes, scraping sides as needed
- Continue processing until smooth and creamy
- Add coconut oil, vanilla extract, and sea salt
- Blend until fully incorporated
- Add unsweetened cocoa powder
- Blend again until glossy and fully mixed
- Portion into small containers or individual packets
- For packets: use small silicon squeeze containers or parchment paper cones
- Store containers in the refrigerator for up to 3 weeks
- OR freeze individual packets for several months
- Enjoy straight from packet or pair with vegetables
9. Cucumber Slices with Hummus
Fresh cucumbers provide hydration and crunch, while hummus contributes protein and healthy fats from tahini and olive oil. Pre-slice cucumbers and portion hummus into small containers the night before.
This snack works especially well during warm weather when refreshment matters as much as nutrition. The combination delivers nutrients with extremely low calories, making it ideal for frequent snacking.
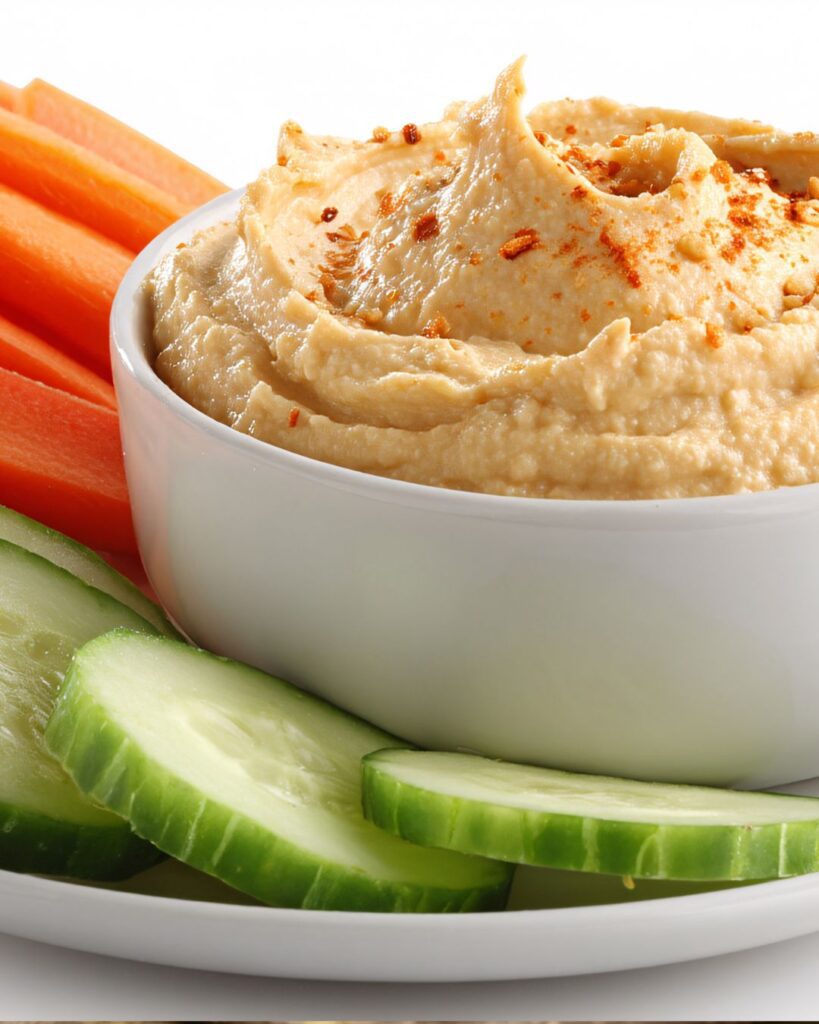
Easy Garlic Herb Hummus Recipe
Ingredients:
- Two 15-ounce cans of chickpeas, drained
- ¼ cup tahini
- Juice of 2 lemons
- 3 cloves garlic
- 3 tablespoons extra virgin olive oil
- 1 teaspoon ground cumin
- ½ teaspoon paprika
- ¼ teaspoon cayenne pepper
- Salt to taste
- Reserved chickpea liquid or water
Instructions:
- Drain chickpeas thoroughly, reserving the liquid
- Add chickpeas to a food processor
- Add tahini, lemon juice, and garlic cloves
- Add extra virgin olive oil.
- Add ground cumin, paprika, cayenne pepper, and salt
- Blend until smooth. Gradually add reserved chickpea liquid (about 2-3 tablespoons) while blending
- Add liquid slowly to reach the desired consistency. Continue blending until completely smooth and creamy
- Transfer hummus to containers. Drizzle additional olive oil on top
- Refrigerate until serving. Fresh hummus keeps for 5-7 days
- Slice fresh cucumbers and pair with portioned hummus
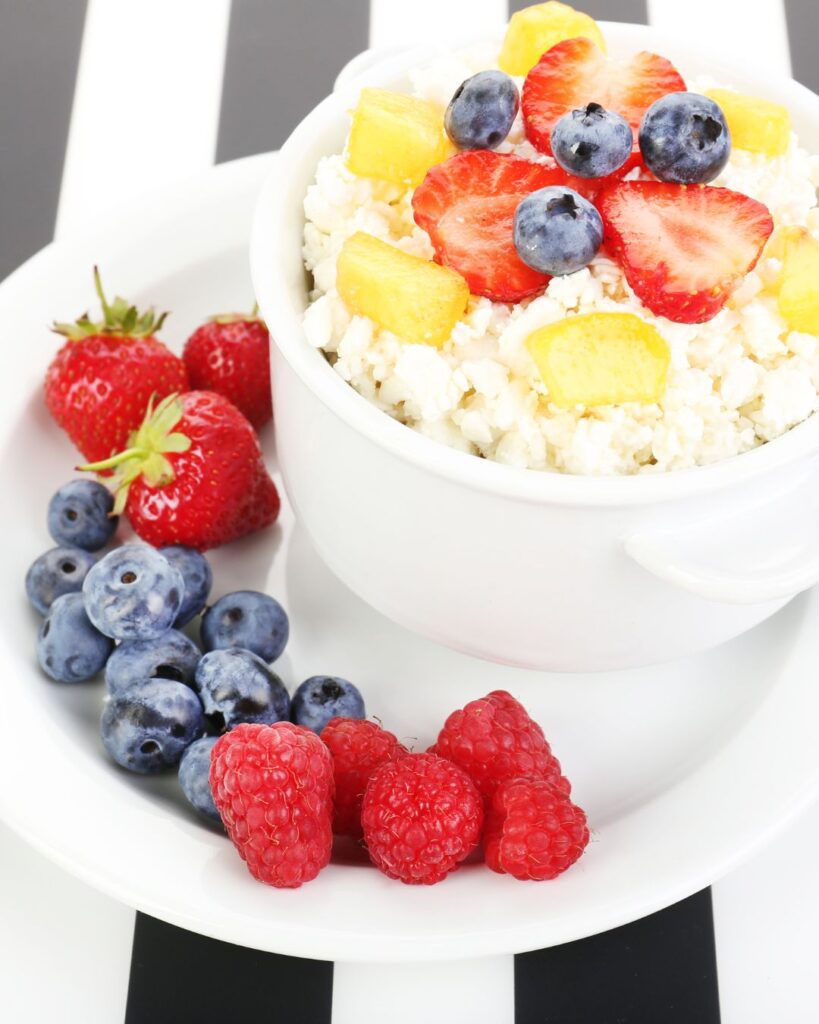
10. Cottage Cheese Cups
Single-serve cottage cheese containers offer convenience, protein, and versatility. Mix with a handful of berries (which contain minimal natural sugars), a few nuts, or cinnamon for varied flavor profiles.
The high protein content makes cottage cheese particularly satiating. Its mild taste pairs well with both sweet and savory additions, allowing customization based on cravings.
Pesto Sun-Dried Tomato Cottage Cheese Cups
Ingredients:
- 1 cup full-fat cottage cheese
- 3 tablespoons prepared pesto
- 2 tablespoons chopped sun-dried tomatoes in oil
- ¼ cup diced cucumber
- 2 tablespoons crumbled feta cheese
- Black pepper to taste
Instructions:
- Pour 1 cup cottage cheese into a bowl
- Add prepared pesto
- Add chopped sun-dried tomatoes (reserve some oil from the jar)
- Fold in diced cucumber gently
- Top with crumbled feta cheese
- Season with black pepper to taste
- Stir gently to combine all ingredients
- Divide into portioned containers
- Drizzle with reserved sun-dried tomato oil if desired
- Seal containers
- Refrigerate until ready to eat
- Stays fresh for 3-4 days
- Serve cold or at room temperature
Pesto Sun-Dried Tomato Cottage Cheese Cups
11. Pepperoni or Turkey Slices
Thin slices of quality pepperoni or turkey provide protein and fat without carbohydrates. Roll slices and eat directly, or pair with cheese for added satisfaction.
These slices require no refrigeration for several hours, making them perfect for travel or outdoor activities. Choose brands with minimal additives and no added sugar for optimal nutrition.

Herb Garlic Turkey Roll-Ups
Ingredients:
- 1 pound fresh turkey breast
- 2 tablespoons olive oil
- 1 teaspoon Italian seasoning
- 3 cloves garlic, minced
- ½ teaspoon red pepper flakes
- Juice of ½ lemon
- Sea salt to taste
Instructions:
- Slice turkey breast into thin cutlets (about ¼-inch thick)
- In a small bowl, mix olive oil, Italian seasoning, minced garlic, red pepper flakes, and lemon juice
- Add sea salt to taste. Place turkey cutlets in a container or ziplock bag. Pour herb and garlic marinade over turkey
- Coat all pieces evenly. Refrigerate for 2-4 hours
- Heat a skillet over medium-high heat
- Cook marinated turkey slices for 2-3 minutes per side
- Turkey is done when cooked through and no longer pink. Cool completely. Portion into containers
- Eat as-is, or wrap around cheese or roasted vegetables. Store in refrigerator for 4-5 days
12. Macadamia Nuts
These creamy, rich nuts deliver high fat content and low carbohydrates, making them ideal for ketogenic dieters. Their luxurious texture makes portions feel indulgent despite their nutritional benefits.
Macadamia nuts provide sustained energy and antioxidants. The high price point makes them special for those seeking snack satisfaction without overindulgence.
Sea Salt and Cardamom Macadamia Nuts Recipe
Ingredients:
- 2 cups raw macadamia nuts
- 1 tablespoon coconut oil, melted
- ½ teaspoon ground cardamom
- ¼ teaspoon sea salt
- ⅛ teaspoon cayenne pepper
- 1 teaspoon vanilla extract
Instructions:
- Spread macadamia nuts on a parchment-lined baking sheet
- In a small bowl, combine melted coconut oil, cardamom, sea salt, cayenne pepper, and vanilla extract
- Mix until well combined. Add nuts to a large bowl
- Drizzle the coconut oil mixture over nuts. Toss thoroughly until all nuts are evenly coated
- Spread coated nuts back on the baking sheet in a single layer
- Roast at 300°F for 12-15 minutes. Stir halfway through roasting
- Remove when lightly golden and fragrant. Cool on the baking sheet
- Store in airtight containers for up to two weeks. Pairs beautifully with coffee or as an after-dinner treat
13. Edamame
These young soybeans in their pods make an interactive, protein-packed snack requiring active engagement to eat. Pre-cooked, salted edamame requires only portioning into containers.
The fiber and protein combination promotes fullness, while the act of popping beans from pods creates a satisfying eating experience. Particularly appealing for those working at desks who appreciate something to occupy their hands and mouth.
Wasabi Sesame Edamame Recipe

Ingredients:
- 2 pounds fresh or frozen edamame in pods
- 2 tablespoons sesame oil
- 1-2 tablespoons wasabi paste
- 1 tablespoon rice vinegar
- 1 teaspoon soy sauce or tamari
- 1 clove garlic, minced
- Sesame seeds for topping
- Sea salt to taste
Instructions:
- Bring a large pot of salted water to boil. Add edamame to boiling water
- Cook for 5 minutes until heated through
- If using frozen edamame, cook until just heated. Drain edamame in a colander
- While edamame cooks, prepare the sauce. In a bowl, whisk together sesame oil, wasabi paste, rice vinegar, soy sauce, and minced garlic. Adjust wasabi amount based on desired heat level
- Transfer warm edamame to a large bowl. Pour wasabi sesame mixture over hot edamame. Toss until all pieces are evenly coated. Sprinkle with sesame seeds
- Season with sea salt to taste. Serve warm or at room temperature
- Store in containers for 3-4 days
14. Cheese and Nut Butter Snack Packs
Combine cheese cubes, nuts, and nut butter into custom snack boxes prepared in advance. These balanced combinations provide protein, fat, and fiber for complete nutrition.
The variety prevents taste boredom and provides different textures in single servings. Prepare multiple packs weekly for grab-and-go convenience.
Apple Pie Cheese and Nut Butter Packs
Ingredients:
For the Apple-Cinnamon Almond Butter:
- 1 cup roasted almonds
- 2 teaspoons cinnamon
- 1 tablespoon coconut oil
- ½ teaspoon vanilla
- ½ teaspoon erythritol
For Each Snack Pack:
- ¼ cup sharp cheddar cheese cubes
- ¼ cup roasted almonds
- 2 tablespoons apple-cinnamon almond butter
- ¼ cup freeze-dried apple chunks (optional)
Instructions:
- Make the apple-cinnamon almond butter first. Add roasted almonds to a food processor. Blend for 8-10 minutes until creamy. Add cinnamon, coconut oil, vanilla, and erythritol. Blend until fully incorporated. Transfer to a container or use immediately
- Cut sharp cheddar into ¼-inch cubes. Divide cheese cubes equally into 5-7 individual containers
- Add ¼ cup roasted almonds to each container. Add 2 tablespoons apple-cinnamon almond butter to each
- Add ¼ cup freeze-dried apple chunks if using
- Seal containers. Refrigerate until ready to eat
- Prepare 5-7 packs for week-long snacking. Store in refrigerator for up to 5 days
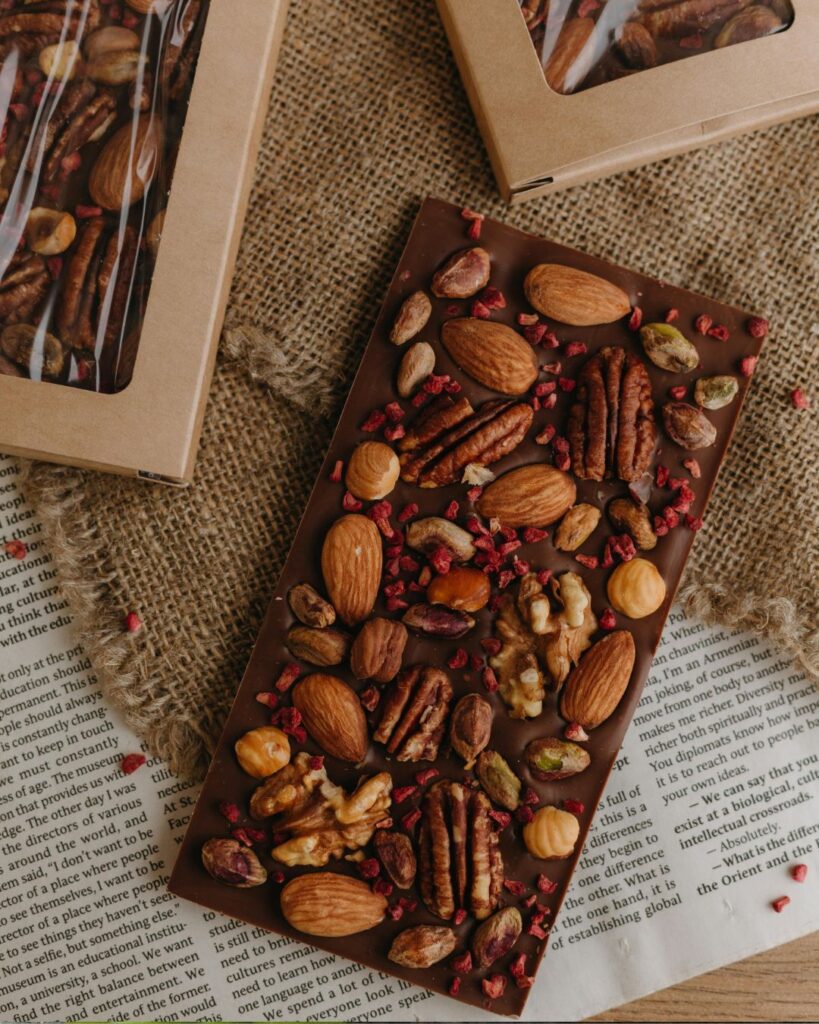
15. Almond Bark
Dark Chocolate Almonds – Sea Salt Almond Bark Recipe
Ingredients:
- 6 ounces unsweetened dark chocolate (85% cacao or higher)
- 2 cups raw almonds
- 2 tablespoons coconut oil
- 1 teaspoon vanilla extract
- ½ teaspoon sea salt
- ¼ teaspoon cayenne pepper (optional)
Instructions:
- Line a baking sheet with parchment paper
- Spread raw almonds in a single layer on a separate baking sheet
- Toast almonds at 325°F for 8-10 minutes until fragrant
- Remove and cool almonds completely
- Chop unsweetened dark chocolate into small pieces. Create a double boiler by placing a heat-safe bowl over a pot of simmering water
- Add chocolate pieces and coconut oil to the bowl. Stir constantly until completely melted and smooth
- Remove from heat. Stir in vanilla extract. Add cooled almonds and fold into melted chocolate until all pieces are coated. Spread chocolate-coated almonds onto the parchment-lined baking sheet
- Sprinkle sea salt on top immediately while chocolate is still warm
- Add cayenne pepper if desired for a spicy kick. Place in refrigerator for 30 minutes until chocolate is completely set
- Break into pieces if they’ve stuck together. Store in airtight containers in a cool location for up to 2 weeks. Perfect for chocolate cravings without any added sugar
Making Sugar-Free Snacks Work for Your Lifestyle
Preparation Strategies
Dedicate one to two hours weekly to snack preparation. Hard-boil a dozen eggs, roast chickpeas, slice vegetables, and portion nuts into small containers.
This batch approach ensures healthy options always remain available. Keep containers organized in your refrigerator for easy grab-and-go access.
Portable Storage Solutions
Invest in quality containers that seal tightly and fit easily into bags or backpacks. Glass containers work well for refrigerated items, while plastic containers suit non-perishable snacks.
Individual portion sizes prevent mindless overeating while ensuring convenience. Labeling containers with contents and preparation dates maintains organization.
Temperature Considerations
Room-temperature snacks like nuts, jerky, and pork rinds require no special storage and travel well. Keep perishable items like cheese, eggs, and hummus in insulated bags with ice packs when away from refrigeration for extended periods.
Most dairy products maintain safety for four hours without refrigeration.
Combining Snacks for Balanced Nutrition
Pairing protein, fat, and fiber creates complete, satisfying snacks that prevent blood sugar spikes. Combine cheese with nuts, pair vegetables with nut butter, or enjoy jerky with seeds. This combination approach provides varied nutrients and prevents taste fatigue.
Budget-Friendly Sugar-Free Snacking
Creating affordable sugar-free snack options requires strategic shopping. Buy nuts and seeds in bulk during sales. Purchase eggs directly from farmers markets or discount grocers.
Choose whole foods over processed sugar-free alternatives, which often cost more. Prepare snacks at home rather than purchasing pre-made options. Watch for sales on cheese, jerky, and other shelf-stable items, buying in bulk when prices dip.
Common Mistakes to Avoid
Don’t assume all marketed sugar-free products are healthy; many contain artificial sweeteners and excess ingredients. Avoid purchasing pre-made snack packs without checking ingredient lists—many contain hidden sugars.
Don’t neglect portion control with calorie-dense foods like nuts and nut butters. Never store snacks in places you’ll forget them; keeping them visible and accessible ensures you’ll actually consume them. Avoid storing foods with strong odors next to other items, as flavors can transfer.
Special Considerations for Different Diets
For ketogenic dieters, prioritize high-fat options like macadamia nuts, cheese, and pork rinds while limiting protein amounts.
Those following paleo diets should focus on whole foods like nuts, seeds, jerky, and vegetables while avoiding processed options. Individuals managing diabetes benefit from snacks combining protein, fat, and low-carb vegetables to prevent blood sugar spikes.
Vegetarians can adapt most suggestions by replacing jerky with protein-rich alternatives like roasted chickpeas or nuts.
Seasonal Variations
Summer months encourage fresh vegetable-based snacks like cucumber with hummus and fresh berries with cheese. Winter seasons support warming options like warm nut butter or roasted chickpeas enjoyed during afternoon breaks. Spring brings fresh herbs to incorporate into cheese and vegetable combinations. Fall offers opportunities to experiment with spiced nuts and seed blends.
Travel Tips for Sugar-Free Snacking
Pack snacks in carry-on luggage or personal bags to ensure availability throughout travel. Non-perishable options like nuts, jerky, and seeds travel best on flights or long drives.
Research airport or destination options for purchasing fresh protein sources like cheese and hard-boiled eggs. Pack snacks prominently to remember eating them—hidden snacks often remain uneaten. Choose individually wrapped portions to facilitate easy consumption without utensils or plates.
Creating Your Personal Sugar-Free Snack Strategy
Assess your daily schedule and identify times when hunger typically strikes. Plan specific snacks for these moments, preparing them in advance.
Consider your taste preferences and dietary restrictions when selecting snacks. Start with three to four favorite options, gradually expanding variety as preferences evolve. Track which snacks keep you satisfied longest, prioritizing these options.
The Nutritional Benefits of Consistent Sugar-Free Snacking
Maintaining stable blood sugar throughout the day improves energy levels, mood, and cognitive function. Sustained energy reduces the need for coffee or other stimulants.
Consistent satiety prevents overeating at main meals. Stable insulin levels support weight management and metabolic health. Mental clarity and focus improve when avoiding blood sugar crashes. Long-term consistent habits reduce disease risk and support healthy aging.
Transitioning from Sugary to Sugar-Free Snacking
If accustomed to sugary snacks, gradual transitions prove more successful than abrupt elimination. Begin by replacing one sugary snack daily with a sugar-free alternative.
Allow taste preferences to adapt—this typically takes two to three weeks. Focus on snacks with naturally sweet elements like nuts and nut butters during the transition. Stay patient as your palate adjusts to less intensely sweet flavors.